

So you have a dead battery, or maybe a boat that’s slow to start? How to test an alternator is a good procedure to know in cases like this. Even if you replace your battery, you may end up with a dead battery again in a few days because your alternator isn’t producing enough current to charge it. If you’re lucky, you may not be able to take your boat out for the day. If you’re unlucky, you may not be able to get your boat back to shore! In this article we cover how to test an alternator, battery, and what voltages you should see from each to ensure your boats charging system is working properly.
Alternators 101
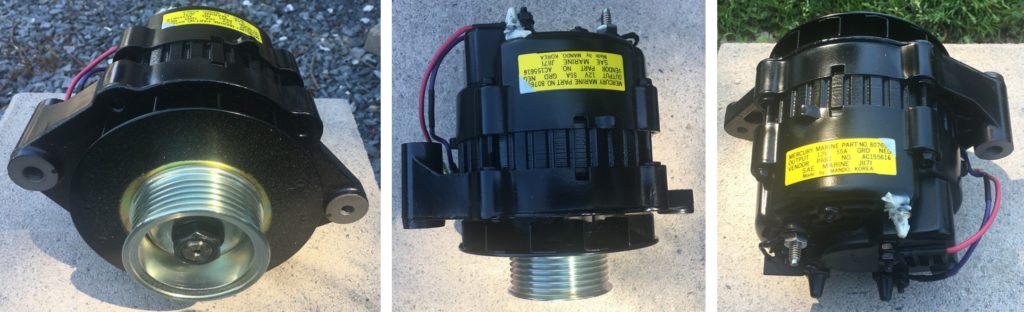
What is an Alternator?
An alternator is a component on your vehicles engine that is used to charge the battery and power 12 volt components while the engine is running. The alternator is typically mounted toward the front of the engine on an inboard engine or road vehicle, and is spun by an accessory belt on the engine driven by the crankshaft.
How Does an Alternator Work?
The alternator produces current by inducing electro magnetic fields. During this process, electricity is created by physically moving the rotor inside of a stationary stator which contains sets of coils. The pulley on the front of the alternator is what is attached to the rotor. The rotor has sets of coils as well that produce a magnetic field. As this field is rotated, it intersects the stator coils causing an alternating current to form in these coils.
The alternating current is converted to direct current via a rectifier circuit. Once converted to DC, the electricity is maintained at a specific voltage via a regulator. This is the constant DC voltage that is found coming from an alternator.
What are Some Signs of a Bad Alternator?
There are a few signs that the alternator on your boat or other vehicle may be failing. It’s important to pay attention to these signs as you can typically spot an alternator that is failing or has failed before your vehicle completely refuses to work.
- Dim lighting
- Squealing or grinding noise coming from the alternator
- Malfunctioning electronics
- Slow cranking
- Dead battery
If you’re seeing any of these signs, be sure to test your system using our guide below.
Steps to Test Your Alternator
Fortunately, an alternator can be tested while it is installed on your boat or vehicle as long as it is in running condition. Below are a few steps to test an alternator.
1. Connect a Multimeter to the Electrical System
Find a good location to put test leads on your electrical system. Most people typically check right at the battery terminals. With the engine turned off, a charged battery should read around 12.6 volts. A range from 12.4 to 12.8 volts is acceptable. Remember to make sure your test leads are on a clean spot for a good reading. Avoid putting them on painted, corroded, or rusted surfaces.
2. Turn the Engine On
With the engine running and your multimeter connected to the battery or other part of the charging system, you will be able to read what voltage the alternator is currently producing.
3. Check the Voltage on the Multimeter
With the engine started, a properly working alternator should put out between 13.5-14.7 volts. If you are not getting a reading within this range, there could be a few different causes that should be investigated. We list a few of these potential causes below as well as a few ways to try to remedy them.
How Much Voltage Should a Good Alternator Put Out?
There are a few voltages you should see in your boat or cars electrical system. There is the voltage the battery should be maintaining while the vehicle is not running, and the voltage the system should be seeing while it is running. The running voltage should always be slightly higher as the alternator is putting out a voltage that is high enough to run the system, as well as charge the battery.
- Normal Battery Voltage: 12.6 volts. A range of 12.4 – 12.8 volts is acceptable
- Engine Running Voltage: 13.5 – 14.7 volts
Depending on the type of engine and alternator you are testing, the voltage could vary slightly. These ranges are a good rule of thumb to stick to.
What can Cause Low Voltage in the System?
If you are seeing a low voltage in your vehicles charging system, there could be a few things causing it. We’ve listed out a few potential options that may be causing some electrical issues, but ultimately it’s up to you to check through them!
Loose Connections
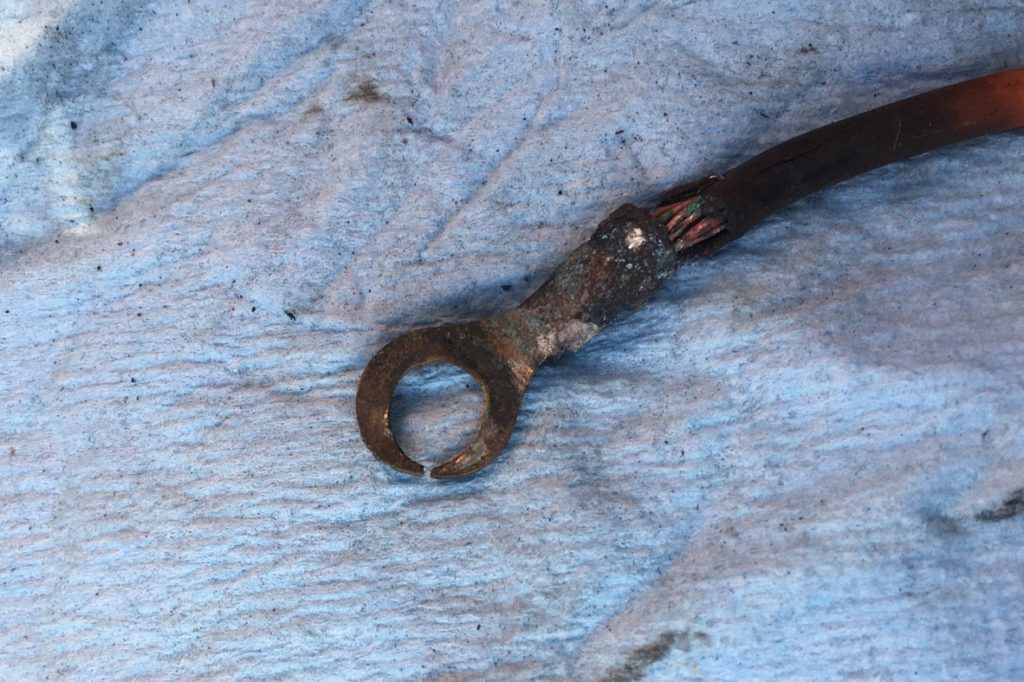
Check any wires connecting to your vehicles alternator to ensure they are all connected tightly and making good connection. Loose connections can make your system work intermittently which can make it appear to function properly, then leave you stranded as soon as a connection vibrates into a different position. The wire pictured above was pulled off of a boat that was having charging issues. This terminal was loose, causing arcing and eventually melted the terminal as well as covered it in arc flash until it was unusable.
Rusted or Corroded Connections
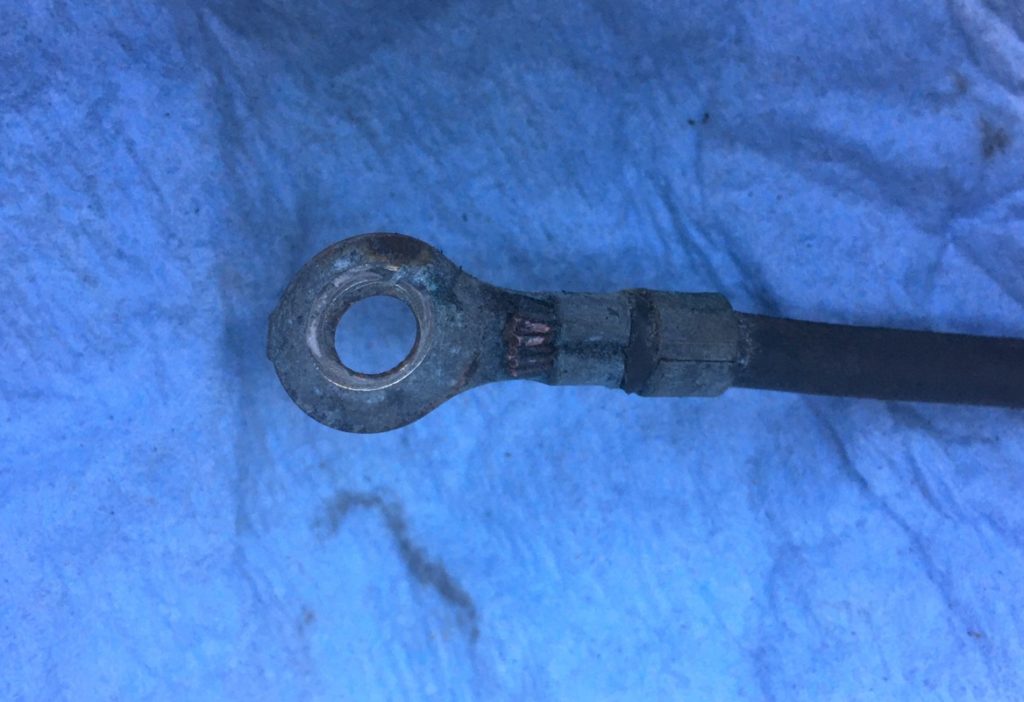
The picture above is a corroded wire pulled off of a boat that was having charging issues. As your vehicle ages, it may see moisture and other harsh conditions. This can be especially true if you’re working on a boat which is naturally always in the water. Moisture in the air and exposure to water (even worse, saltwater!) can cause corrosion and rust on the system components. This creates resistance in your wiring which prohibits the flow of current. If not corrected, you could see a drop in voltage in your system resulting in the battery not being charged properly. We all know what happens after that.
Check out our article on cleaning wire terminals for tips on cleaning rust or corrosion on your vehicles electrical terminals.
Broken Wires
It goes without saying that if a wire is damaged or broken, it won’t function as intended. Inspect the wires in your system to ensure they all look healthy and repair them if not. It’s best to completely replace a damaged wire if possible, but some may be a part of a wiring harness that would make this difficult. If a charging system, the cables coming off of an alternator are typically thicker cables and aren’t always contained in a wiring harness.
Failed or Failing Alternator
If everything else in your vehicles electrical charging system passes the test, you may have an alternator that is going bad. To skip the other tests and go straight to the alternator, it is possible to test the alternator right at the terminals by putting your multimeter straight on them. By testing in this manner, you will be bypassing any potentially bad wiring. Be careful if doing this as there are moving components on the engine and you want to ensure you do not touch them. Consider using a set of alligator clips to clip from your multimeter directly to the back of the alternator so you do not have to put your hands near a running engine.
Final Thoughts
Keeping your vehicles charging system operating properly is a big deal. Taking the steps to identify if it’s operating properly can save you from some larger headaches down the road. We hope this guide has helped you not only understand how your vehicles 12v charging system works, but also how to identify a potential issue. Check out our other articles for tips to keep your electrical system in tip top shape so you can ensure your boat will be as reliable as possible during your time out.