
An essential part of maintaining your boat is to change the oil in an outboard unit at least once a year. Your boat’s outboard unit contains gears that need to be lubricated to ensure they run smoothly and do not wear prematurely. If not performed regularly, this unit could become damaged resulting in the potential of being stranded, and a potentially hefty repair bill as well. Those are two things that no one wants. Follow this guide and find out more about your boats outboard, why the oil needs changed, and how to change it below!
What is the Outboard and Why Does the Oil Need Changed?
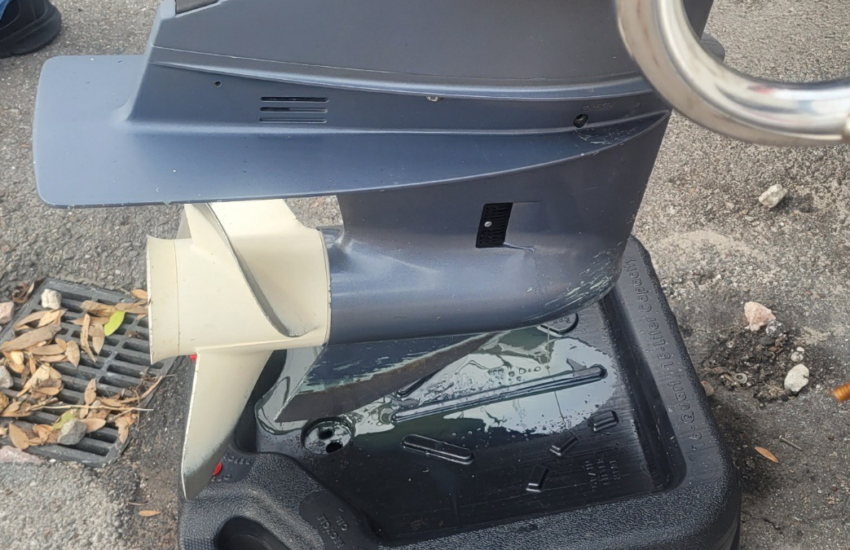
Your boats outboard is the unit that is submerged in the water and drives the propeller. Whether you have an inboard outboard (I/O) or simply and outboard engine, they both contain a driveshaft and gear system located in the lower unit, or lower portion, of the assembly. This lower unit houses the gears that convert the vertical driveshaft to a horizontal orientation so the propeller can be oriented in a horizontal manner.
In the northern parts, it is recommended to change the oil in the outboards lower unit during the winterization process. This is so the oil can be inspected for any water, and removed prior to winter so it does not freeze up. If you do not live in an area that freezes or requires winterization, simply consult your outboards manual to see the recommended change interval.
Required Components
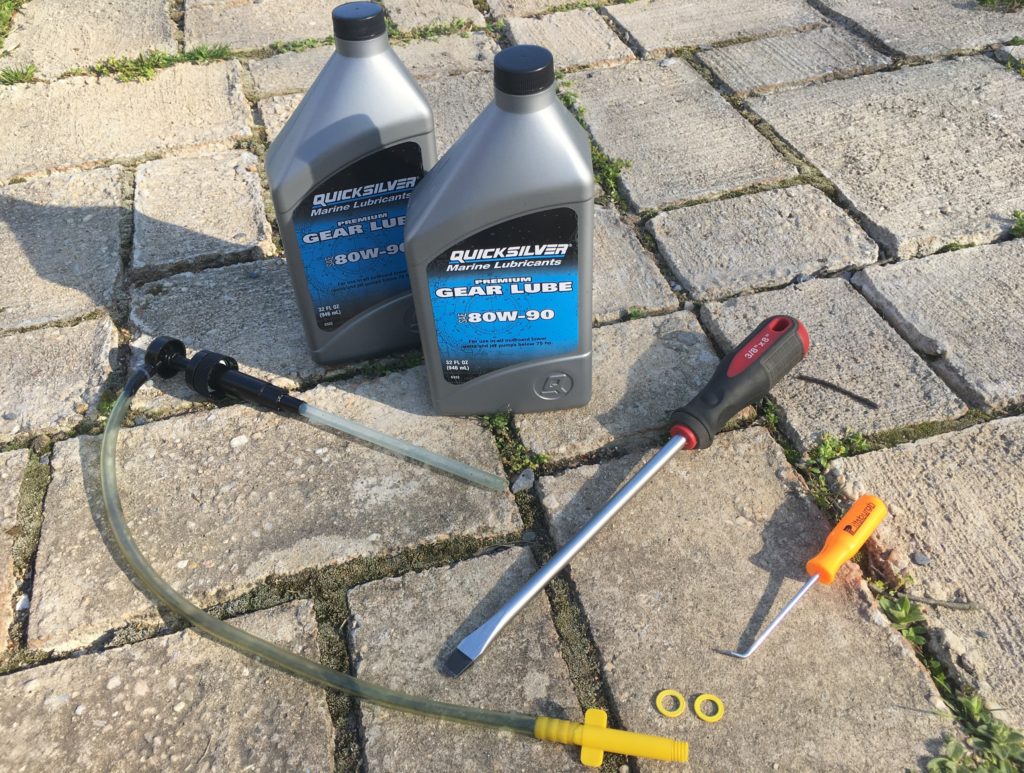
Here we’ll go over a few components that will be necessary to complete your outboard gear oil change. Make sure to have everything available before you start your change as it will make everything go quicker and much smoother. Having the correct tools is also essential to successfully change the oil on an outboard.
Required Tools
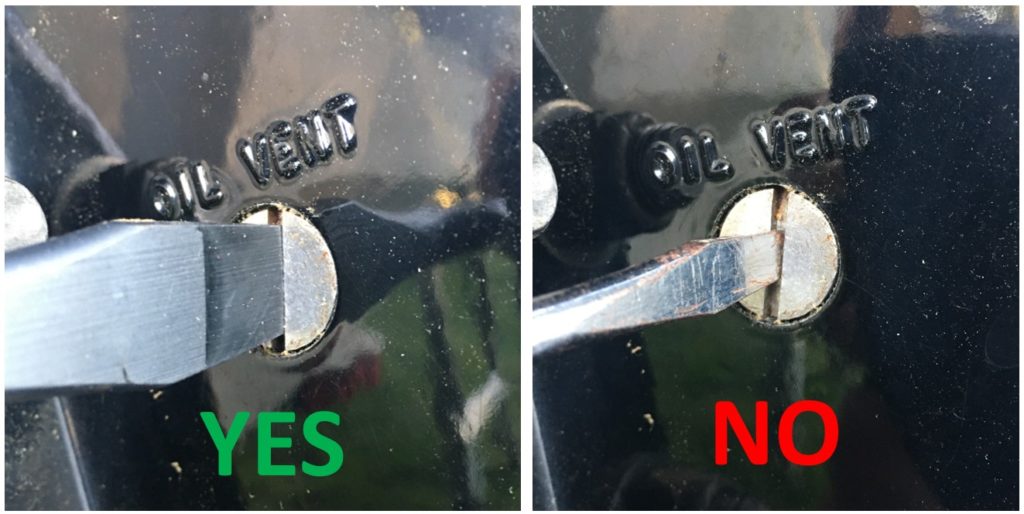
It’s very important to make sure you have a screwdriver that fits properly in the vent and drain plugs. A screwdriver that has too much play or slop within the slot can damage the plug. If an improperly sized screwdriver is used continuously, the plug may get to the point where the screwdriver insertion point becomes rounded, worn, and damaged to the point where it may need replaced, or even worse, is unable to be removed with a screwdriver. Use the proper tools to keep minimal damage from occurring!
Required Parts
- Drain and vent plug gaskets
- SAE 80W-90 Oil (gear lube)
Procedure
The exact model used in this procedure is a Yamaha 60hp 2 stroke outboard, however, this procedure is similar for all makes and models of outboards. This particular unit is also an outboard unit meaning the engine and gearbox is located on the outboard, but inboard outboard setups also have oil in their lower units. The procedure for changing this gear oil is similar between both styles and different manufacturers.
1. Remove Drain Screw
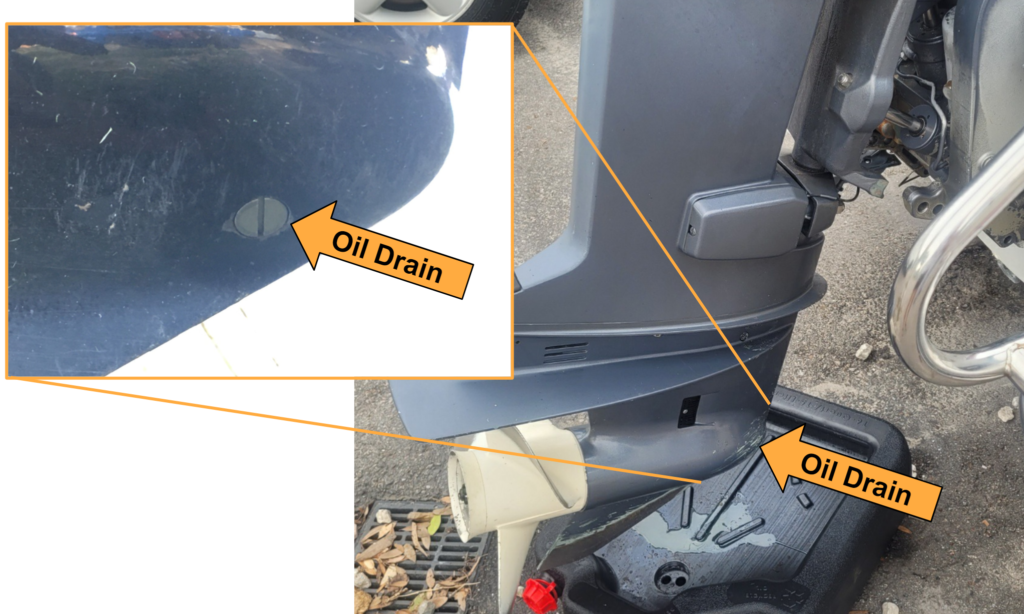
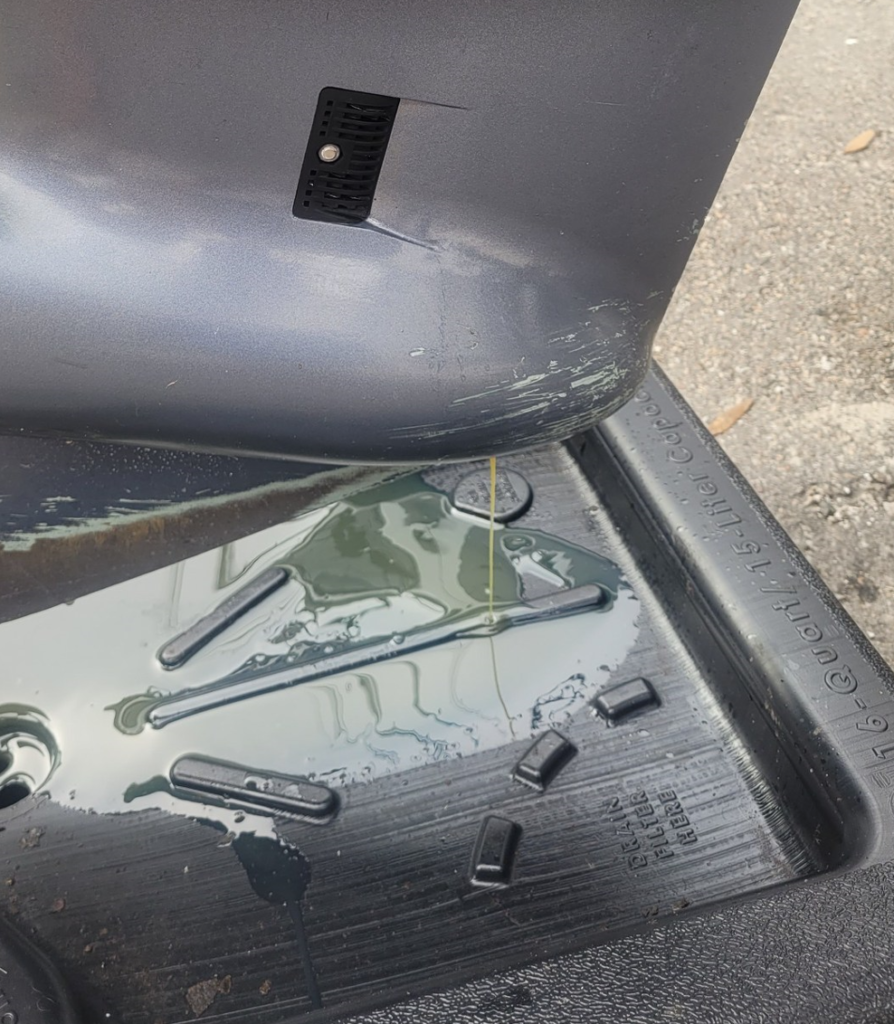
To begin the draining of the old gear oil, make sure the outboard is in the down position so the fluid can drain properly. Prepare an oil pan under the unit to catch the used oil. Once ready, remove the drain screw which is the lower screw closer to the propeller on the unit. Once removed, the oil will slowly drip into the pan.
Note: Make sure the old gasket came out with the screw and did not get stuck in the outboard unit. If it did not come out with the screw, gently remove it from the drain hole area with a pick or small screwdriver once the fluid has completed draining.
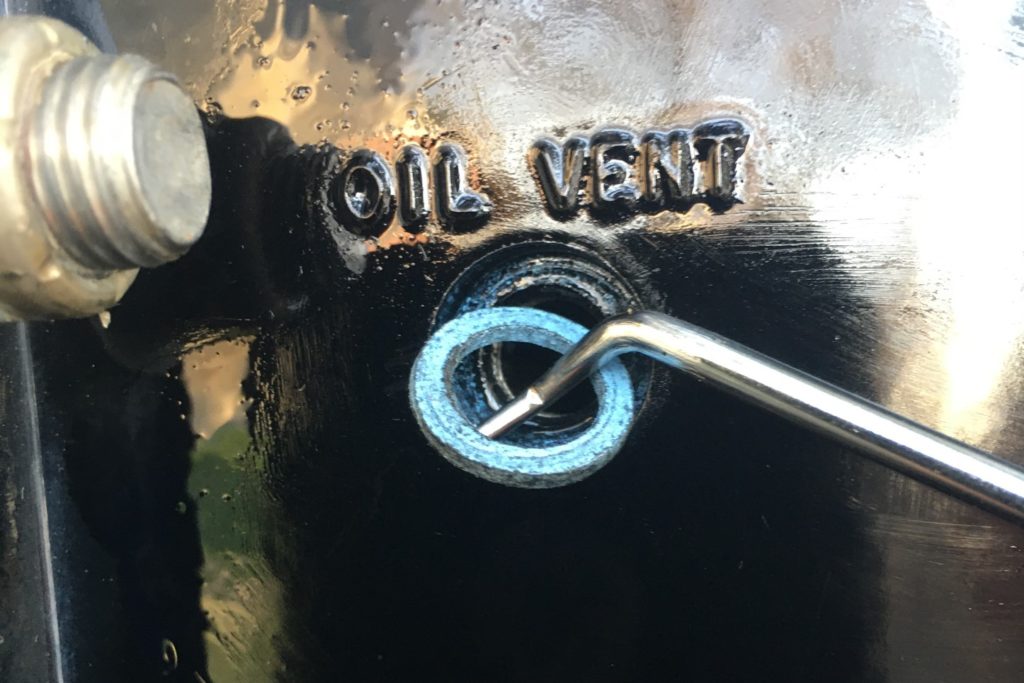
2. Remove Vent Screw
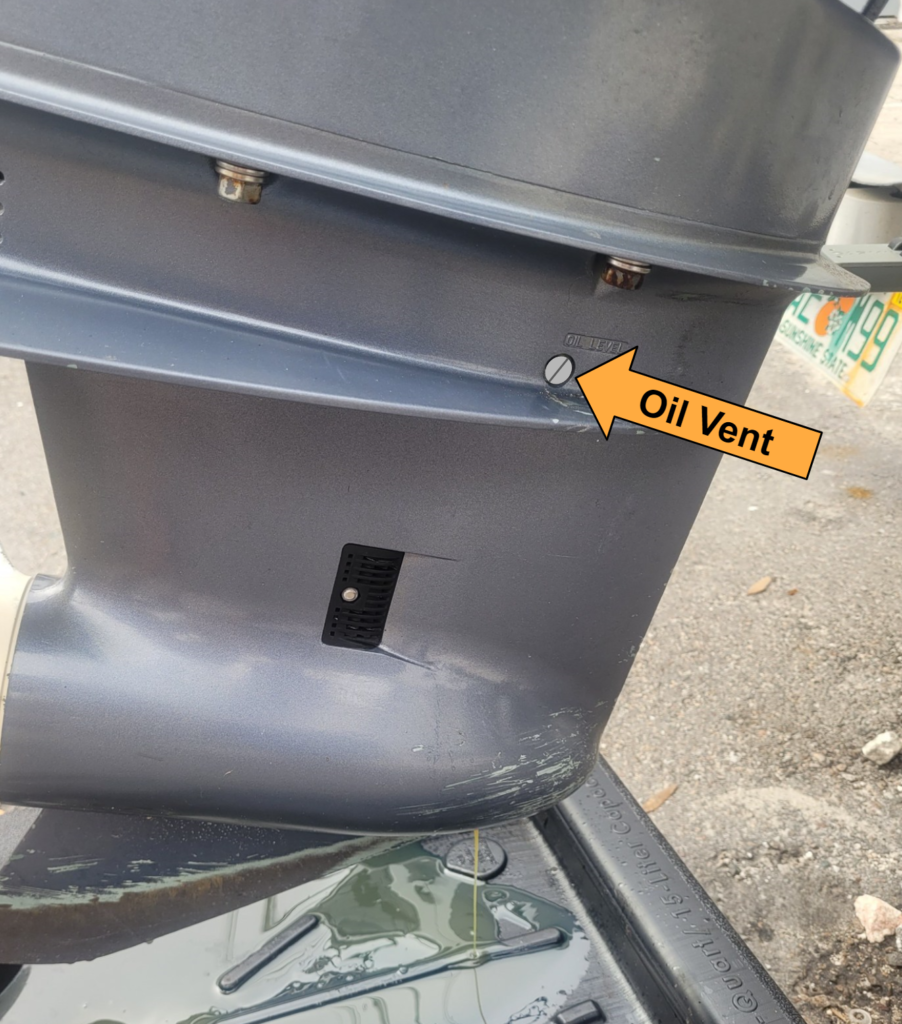
Once the oil is draining into the pan, locate and remove the vent screw on the unit. This will be the upper screw. Once removed, the oil will start to drain into the pan at a quicker rate as the vacuum created inside the unit will be removed.
Note: Make sure the old gasket came out with the screw and did not get stuck in the outboard unit. If it did not come out with the screw, gently remove it from the drain hole area with a pick or small screwdriver.
3. Pump New Gear Oil Into Unit
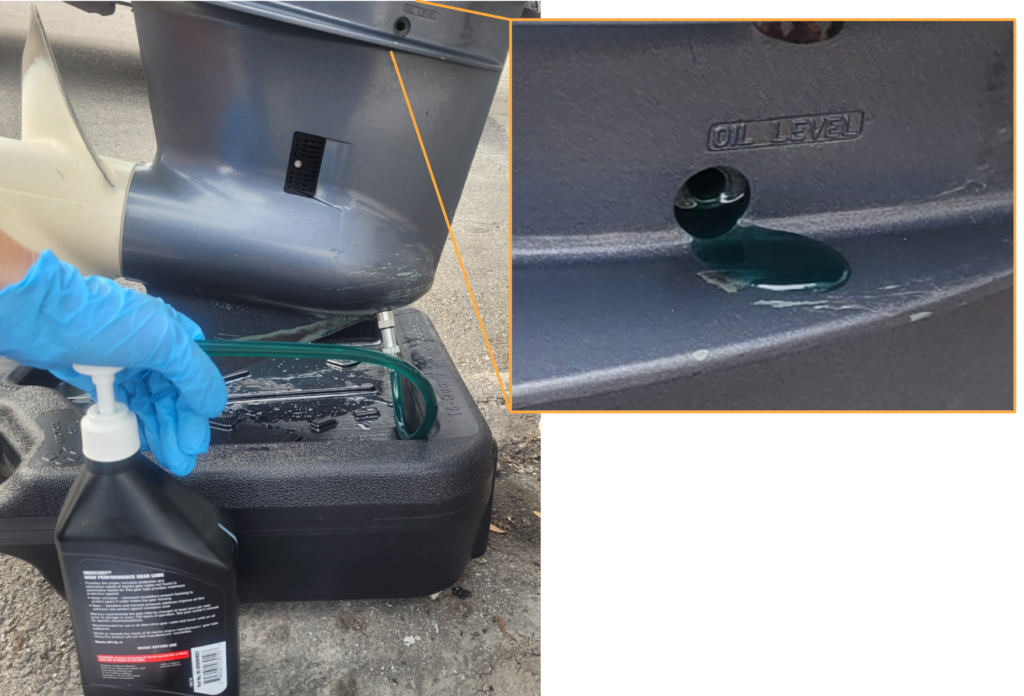
Once the oil has completely drained from the unit, it is time to pump fresh oil in. Simply insert the pumping mechanism into the fresh bottle of gear oil and thread it onto the bottle. Connect the exit side of the pump to the drain hole of the outboard unit by threading the hose end into the drain hole. Remember not to cross thread or over tighten the unit if it is plastic as this could damage the threads. Pump new oil into the unit until it seeps out of the upper vent hole. At this point, the unit has been filled.
4. Insert Vent Screw
Insert the vent screw with the pump still attached to the drain hole. Remember to use a new gasket on the screw to keep the gear oil from leaking out, and sea water from entering the system.
Tip: Be sure to insert the vent screw before disconnecting the pump as it will create a vacuum and help hold the fluid in the unit while the pump is disconnected from the drain port.
5. Insert Drain Screw
Once the vent screw has been inserted, a vacuum will now be created that will help hold the oil inside. Remove the pump from the drain hole and quickly insert the drain screw. Remember to use a new gasket on the screw to keep the gear oil from leaking out, and sea water form entering the system.
Tip: Before you fully unscrew the pump from the drain hole, have the drain screw ready in your other hand so you can quickly thread it into the hole without losing too much oil. Keeping your drain pan under the unit during this swap will catch any dripping oil.
Additional Notes
While you change the oil on an outboard unit it’s good to inspect the oil as it drains. White milky oil can mean your unit may be getting water inside the oil compartment. This is important to catch because it may mean you have another issue such as a bad seal in your system. If water enters the gear compartment, premature wear and potential damage to the gears within could be the result.
Final Thoughts
Being an essential part of maintenance your boat requires each year, we hope you found this guide to change the oil in an outboard unit helpful. this can be applied to many types of units as they all have similar setups between different makes and models and all require gear oil. It’s a simple process that we’ve tried to make even easier for you and hope you found everything you need and are successful in your outboard unit gear oil change!
Smooth Sailing Marine is powered by product recommendation partnerships.
If we have helped you in your product decision or marine project, you can help us by purchasing through our links. We thank you for your support, we couldn’t be here without our awesome readers!