
Have you ever wondered what life would be like with a fuel injection conversion instead of your carbureted engine? Perhaps you’ve been fighting the same issues for years. Misbehaving on cold starts, vapor lock causing starting issues after the engine has been warmed up, carburetor ports clogging and needing cleaned and or rebuilt. The list goes on and on.
We’ve had people ask about fuel injection swaps in the past which intrigued us. We started looking into such possibilities as the sound of not having some of these issues was a good one to hear.
For some engines, OEM parts can be scavenged together to piece a swap together. There are also a few options for purchasing kits off the shelf. After doing a price comparison, we found the premade kits were very enticing. We ended up buying a kit, installing it, and giving it a test run. Everything we considered from why we bought the kit, installation process, and the outcome was recorded and described here. We hope you enjoy the article and find it helpful if you’re also considering a fuel injection conversion for your boat (or vehicle)!
What is a Fuel Injection Conversion?
A fuel injection conversion is essentially taking an engine that is carbureted and swapping the carburetor for a an electronic fuel injection (EFI) system. Both a carburetor and a fuel injection system function to add the perfect air to fuel mixture to your vehicles engine. Fuel injection systems were introduced in the 1950s, and had replaced carburetors in most road vehicles by the early 1990s. It took a little longer to happen in the marine scene, but modern day boats are also powered by fuel injection for many reasons.
Why Swap to an EFI System?
We’re not here to bash on carburetors as they did a great job for years and have a lot of advantages. There has been an age old debate on which setup is best, and there are a lot of people that swear by carbs and will argue for their reliability and simplicity until the end.
We do, however, realize that carburetors aren’t for everyone and do have their issues. Carb issues can keep the average boater from enjoying their time on the water, and can also leave you stranded if you’re unlucky. Carburetors can be intimidating for someone that hasn’t worked on them and contain a lot of small parts that need tracked and taken care of when rebuilding.
There are many ports, passages, and jets inside of carburetors that can clog if any debris enters the system or if fuel gets gummed up over time. Carbs should be rebuilt every few years, but even if rebuilt, any debris can clog a port or jet if it makes its way through the system. Someone mechanically inclined may favor their carb, but for the average boater it may be more hassle than fun.
What System Did we Choose?
For our test rig, we looked into a few different systems for our EFI conversion. There are a few different options out there. Below are a few of the options we found, and our thoughts on them as we made our own decision.
Kit Options
- EFI parts from a donor vehicle. The first thing we considered was piecing together our own kit from a donor vehicle. This ended up proving to be a task that would be time consuming and tedious. On top of the time, all the parts would have been used unless purchased separately. Used parts would have made the boat potentially just as unreliable as it was originally for the owner. When the price of time and effort required to piece together and refurbish the used parts was considered, there wasn’t a huge cost savings.
- Self Tuning TBI Kits. Another style system on the market are self tuning throttle body kits built by companies such as Holley and FiTech. We liked the idea of having a simpler system to install with features such as a compact built in ECM and no need for messing with distributors. However, we also felt this may not give us the exact performance we needed and wanted to have something closer to an OEM system built for our engine.
- Custom Assembled OEM Setup Kits. As we searched deeper into the pages of the internet, we discovered companies that actually assemble kits that would be similar to our original idea of pulling parts from a donor vehicle. This meant the kit was for a system that was engineered and built for the engine were were working on from the factory. Other differences that set these kits apart from our junkyard part search were the fact that these companies had already combined everything needed for the conversion into their kits and they weren’t made of a bunch of parts that were 30 years old.
Our Decision
After looking into the many options available on the market, there were many kits that looked like they could be the best for us. After weighing the options, we decided to go with a legacy marine fuel injection conversion kit by Affordable Fuel Injection. While shopping for our kit, we actually called the folks at Affordable Fuel Injection to ask a few questions and confirm some of our thoughts. They picked up on the first try and we were able to speak to a real person. They were extremely knowledgeable and able to easily answer all of our questions.
What We Liked
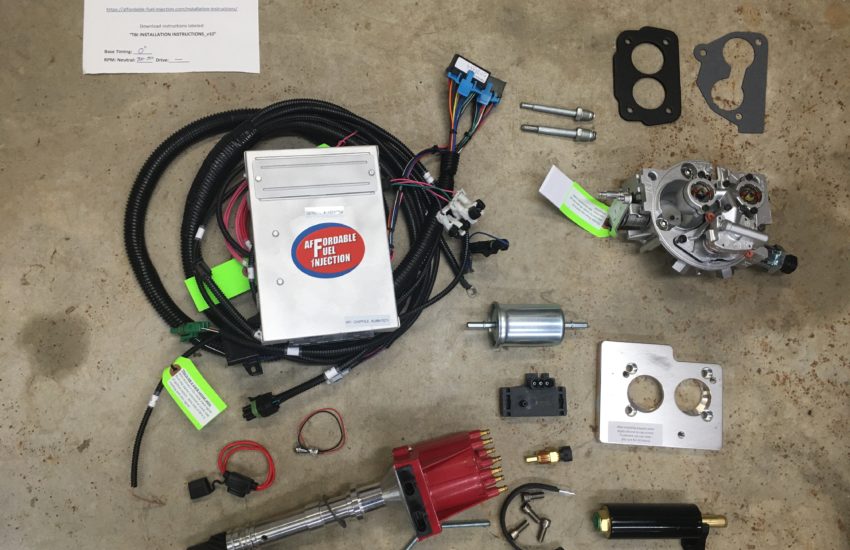
There were a handful of items that persuaded us in making our decision. We’ve listed some features of the kit we chose from Affordable Fuel Injection that caught our attention and made our decision an easy one.
- OEM design. The kit we purchased is made of parts that are found on thousands of vehicles with TBI installed from factory on a 4.3l engine. This means there was no additional or new engineering that had to go into building it. It is a proven system that has been used on the road for years.
- Readily available replacement parts. With parts being standard parts that can be found on popular vehicles on the road today, replacement parts can be sourced with ease. Any of your favorite local auto parts stores as well as bigger performance stores and online stores carry parts that can be used on our system. On top of that, junkyards and marketplaces for used auto parts contain a lot of these components as well.
- New/Refurbished parts. All of the parts in the kit we purchased were either new or refurbished, with most of the parts being new. The only refurbished parts were the TBI unit itself an the ECU.
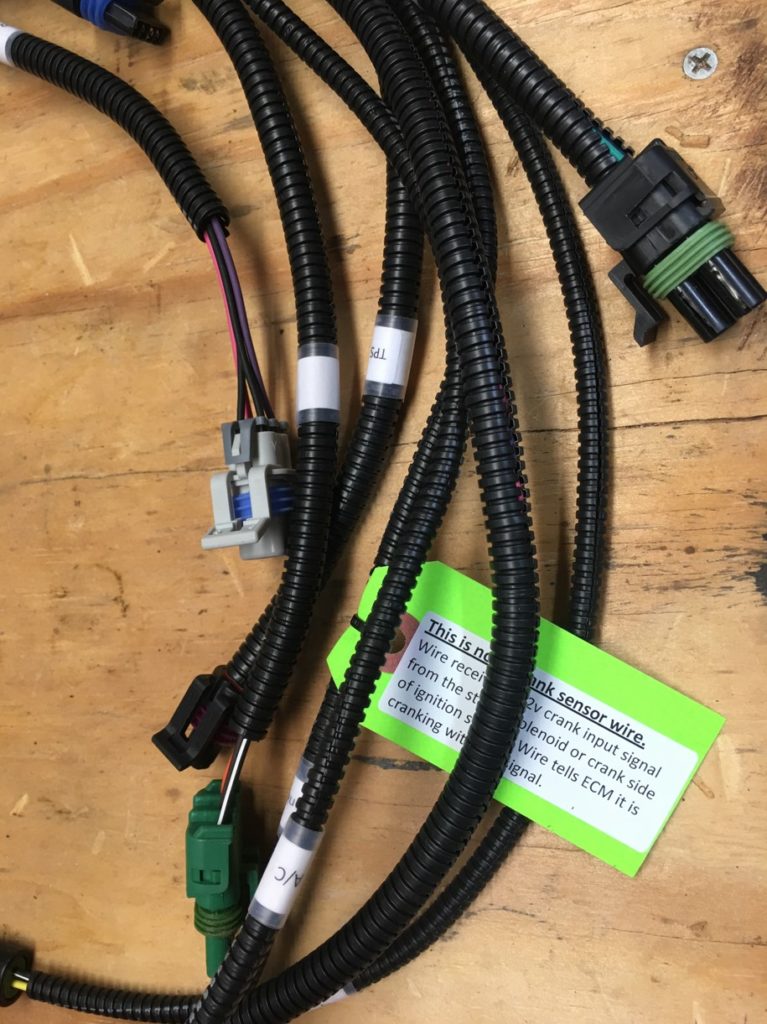
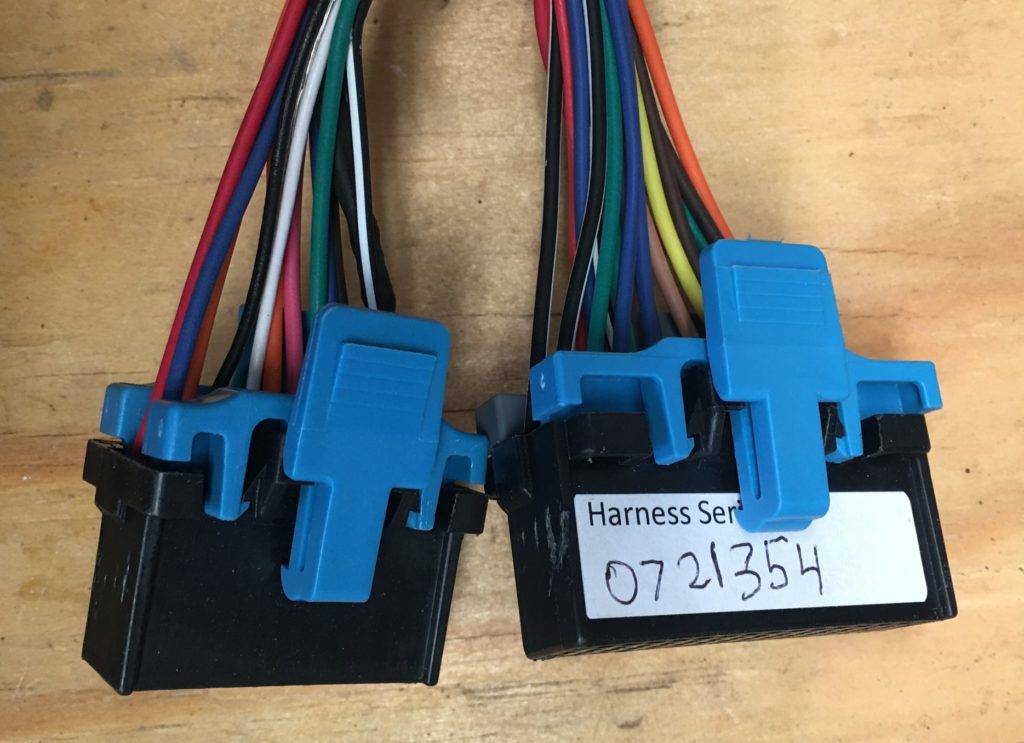
- Easy labels on wiring harness. The wiring harness was completely brand new and custom built for our application. Along with fresh wiring and plugs came labels on all of the plugs and wires that needed connected which made the job even easier.
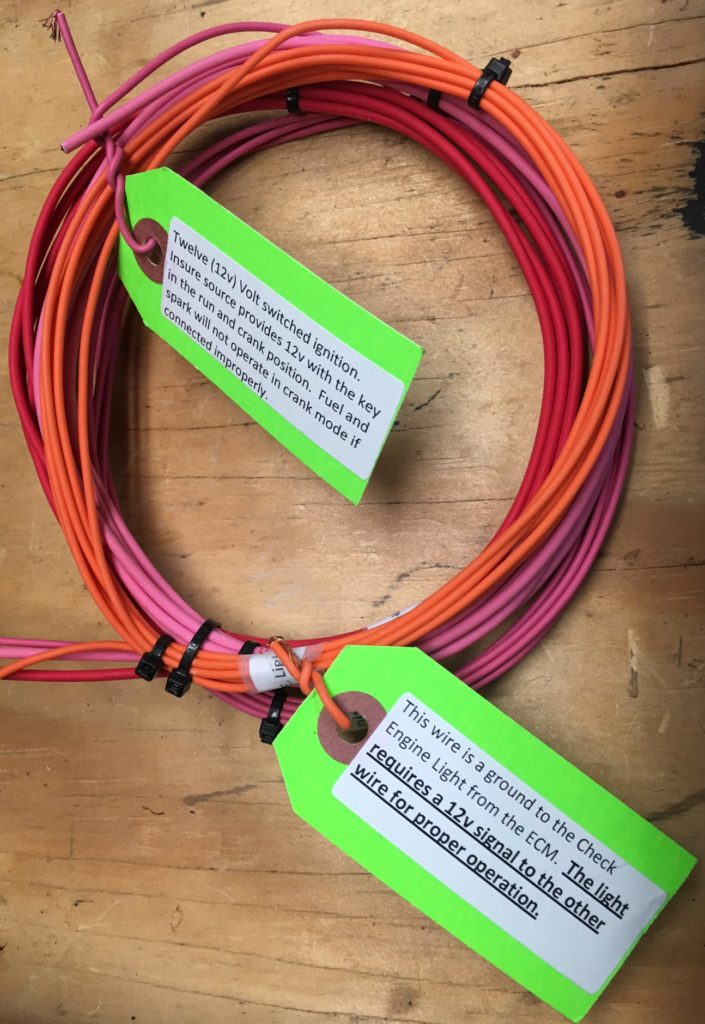
- Instructions and tags for different components. Any component that may not be as simple as plugging a plug in came not only with labels but also a tag with a note attached. This kept any mistakes from being made and made the installation quicker as the research was done for us.
- Easy bolt-on kit. Affordable Fuel Injection includes the proper TBI adaptor plate and bolts machined for your application. This means the unit bolts down to the intake manifold with no additional parts or pieces needed. The only major component we had to be creative with was a custom throttle cable bracket.
- Complete kit minus fuel lines and throttle cable bracket. The kit we ordered had almost everything we needed to be up and running. There is no perfect kit out there that includes every single piece for every application, so we were more than happy with what we saw. Read on to see exactly what we had to do for these items.
- Mostly plug and play wiring harness. The wiring harness was very impressive and made for an extremely easy installation. Most of the harness was made of simple plugs for components. There were only a few wires that actually needed terminated which included the fuel pump, power, ground, ignition, and a check engine light. Depending on the kit you purchase there may be more or less to terminate, but overall it was very simple.
Installation Process
The installation process of the fuel injection conversion kit was extremely straight forward. We partially knew what to expect going into the project, but once all of the parts arrived and we compared them to the instructions we were ensured it wasn’t going to be an overly complicated job.
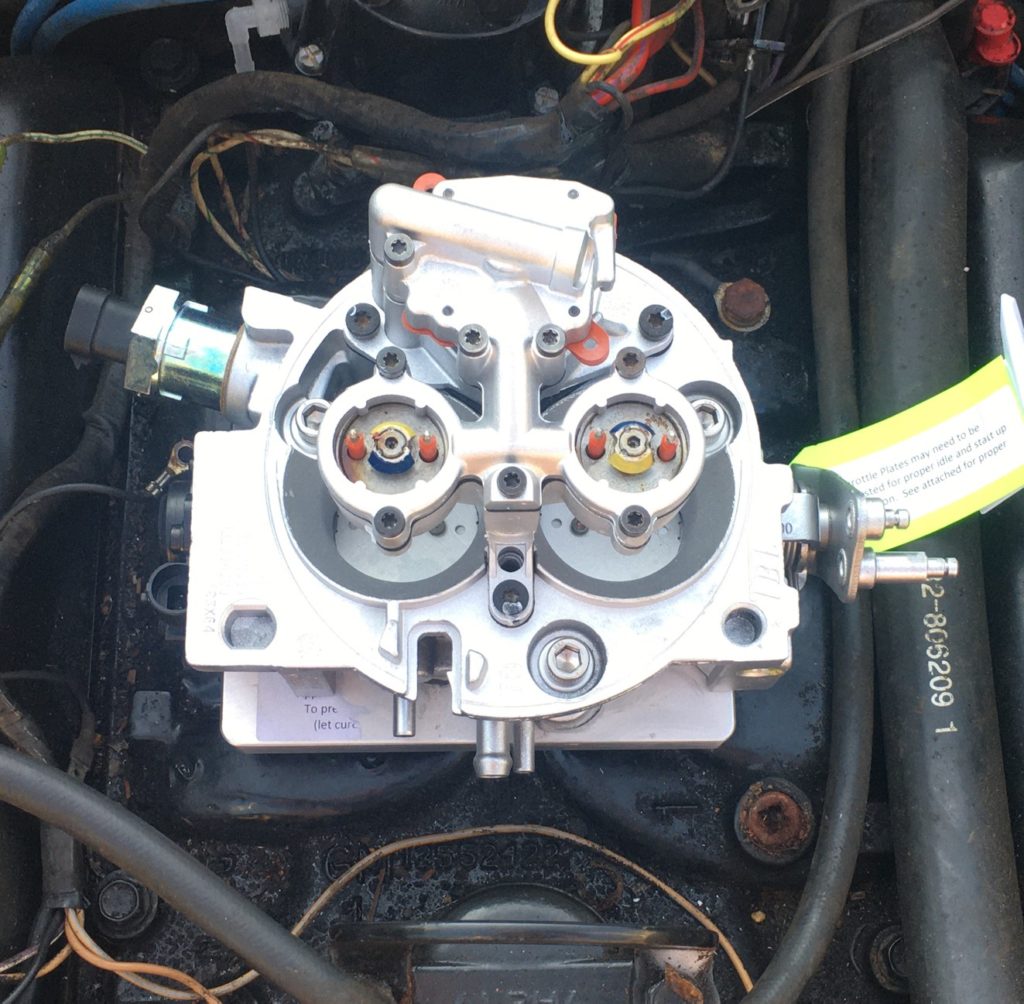
Throttle Body Injection Unit
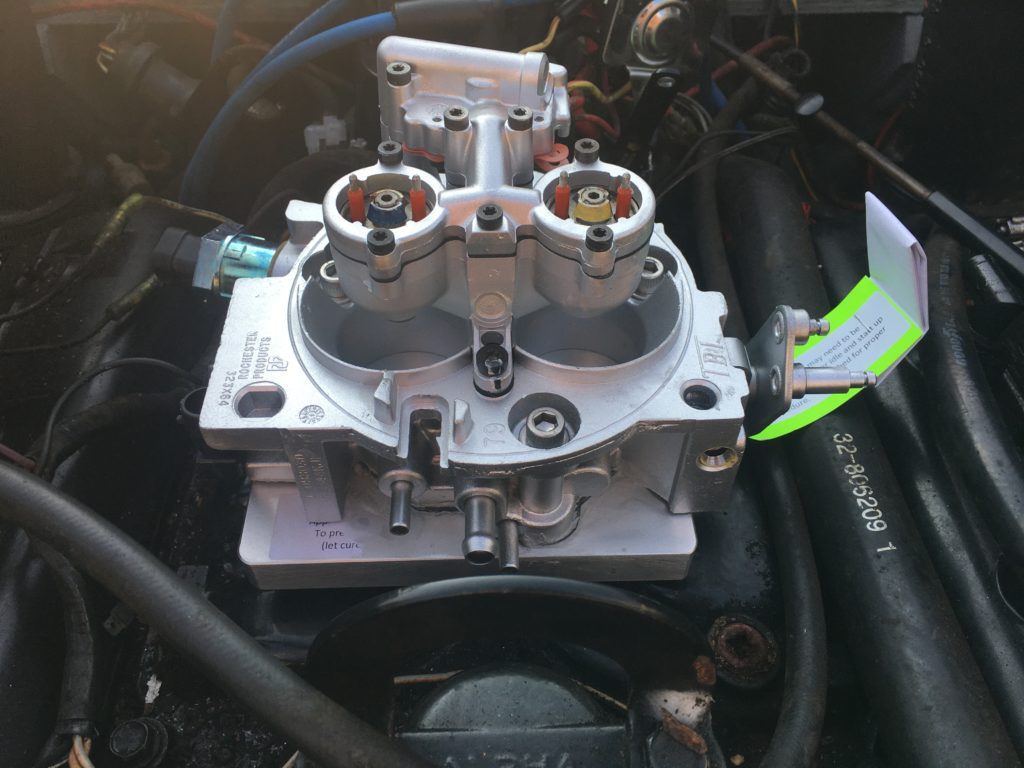
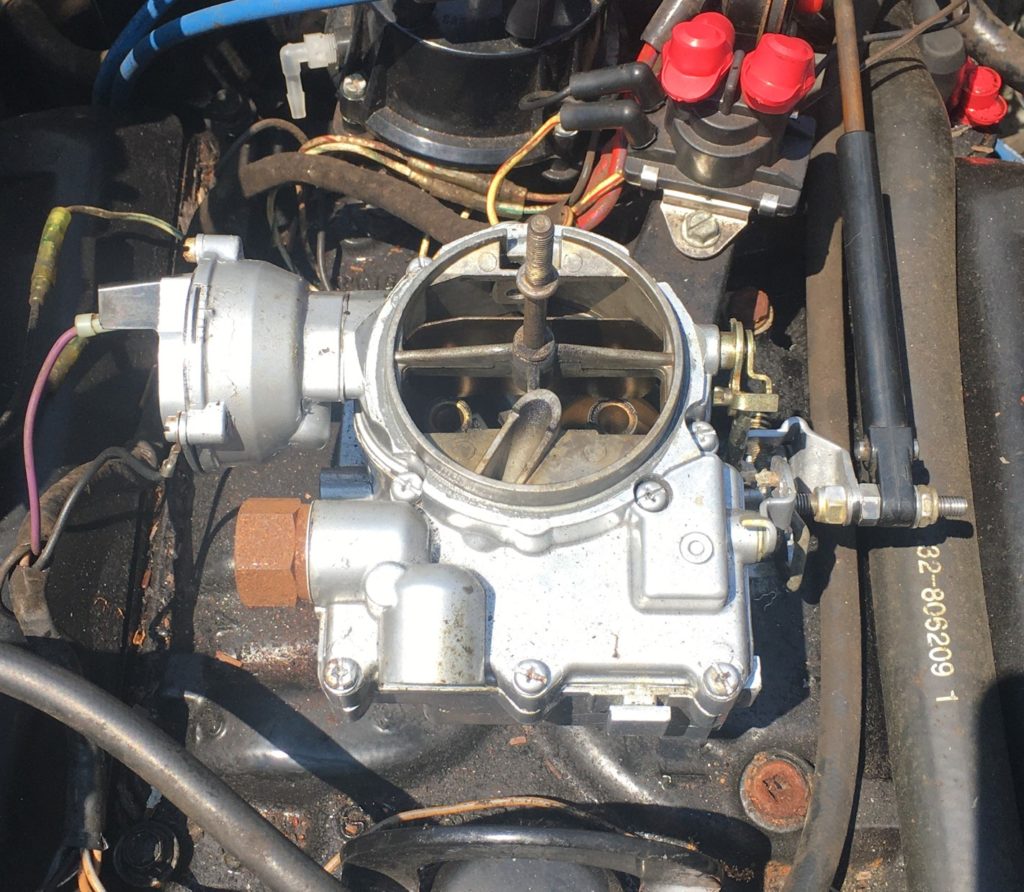
The first part of the conversion we tackled was the removal of the old carb and the installation of the new throttle body. The carburetor had a single fuel line running to it, two wires for the electric choke, and the throttle cable connected to the throttle plate assembly. These only took a few minutes to remove. The actual carb is held down by 4 studs in the intake manifold and comes right off by removing the nuts from the studs. Within minutes we were already staring down the runners of the intake manifold.
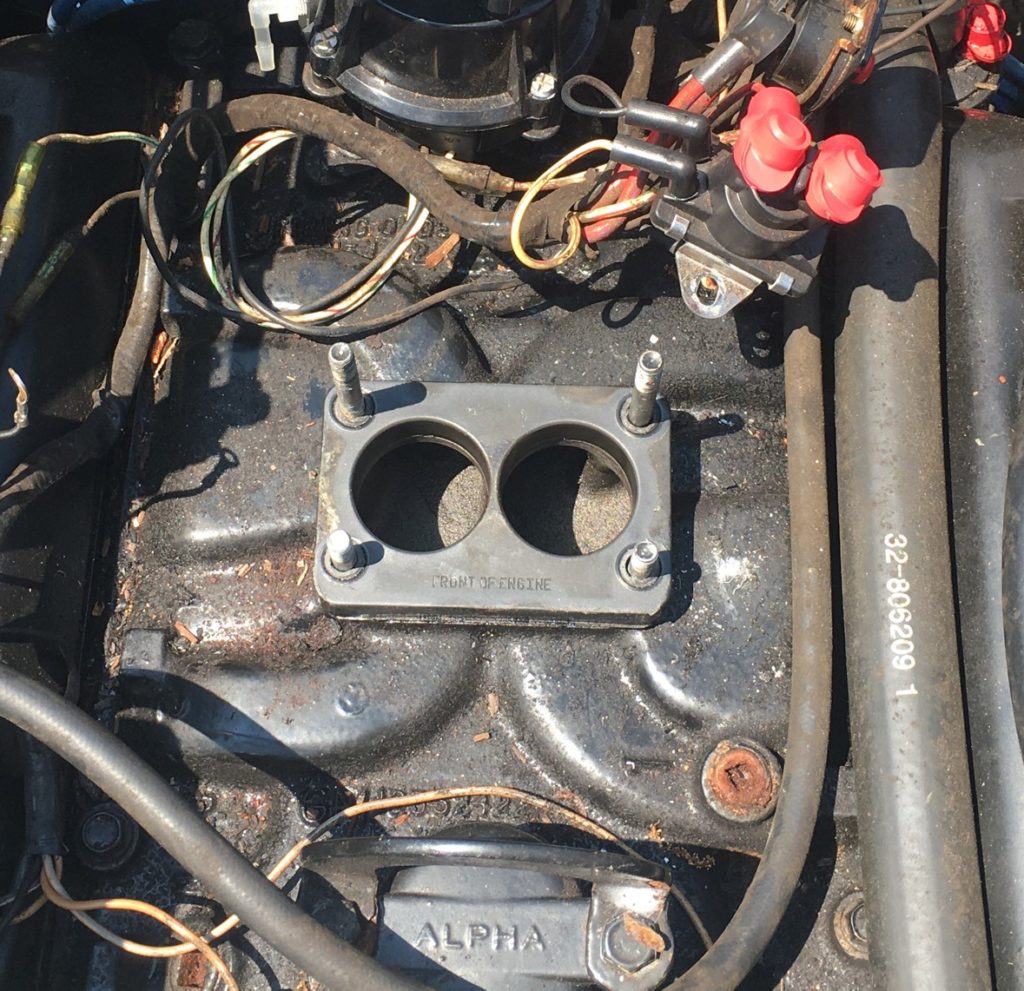
With the carb removed, the studs in the manifold could be removed and our surfaces cleaned up. Inside our kit, we had everything from fresh bolts to new gaskets to install the adaptor plate to the manifold, then the throttle body to the adaptor plate. Once all of the old components were removed, the new parts only took a few minutes to install. We were off to a good start.
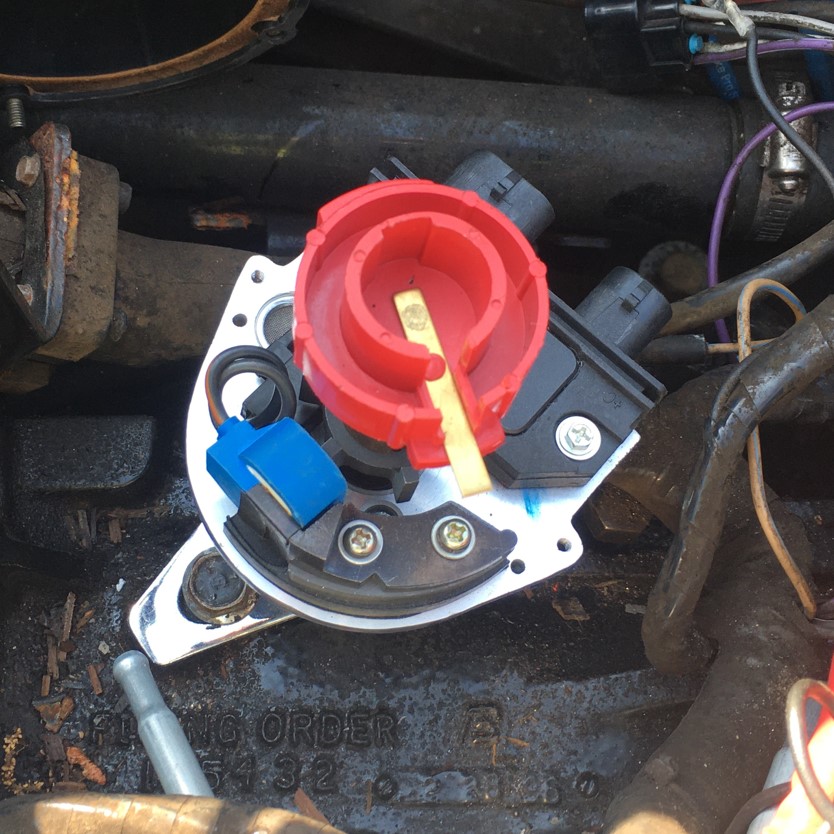
Distributor
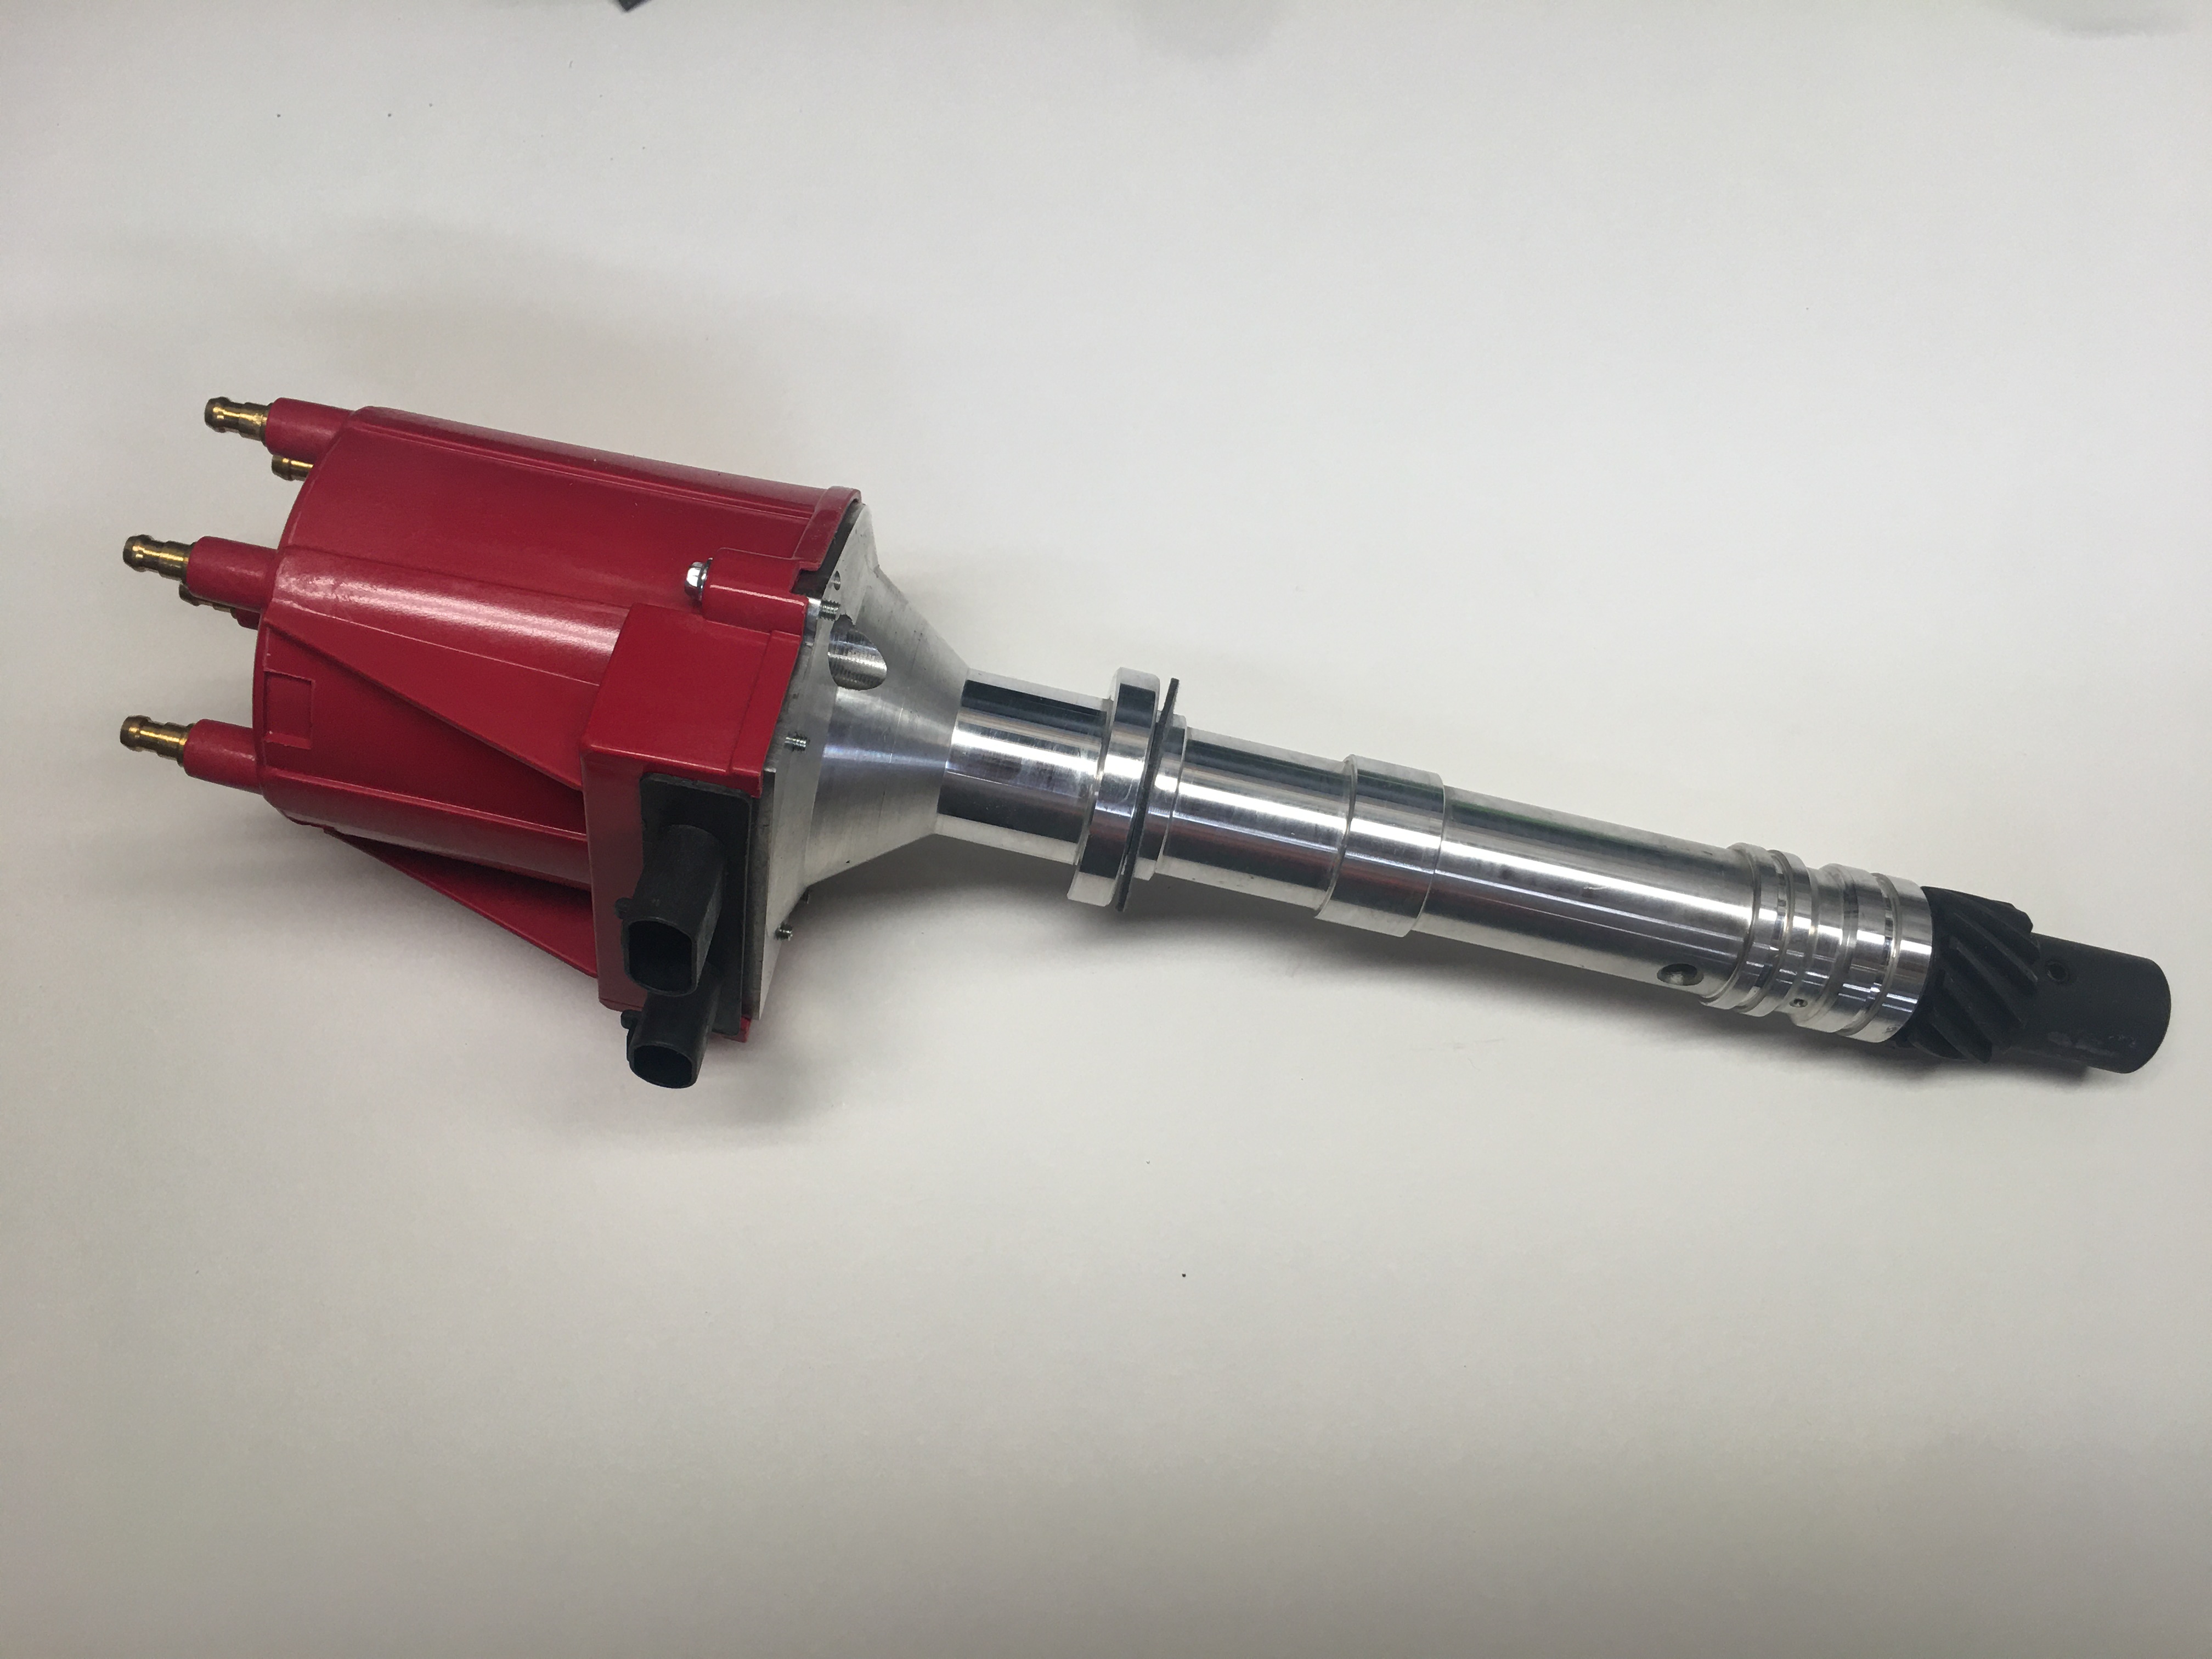
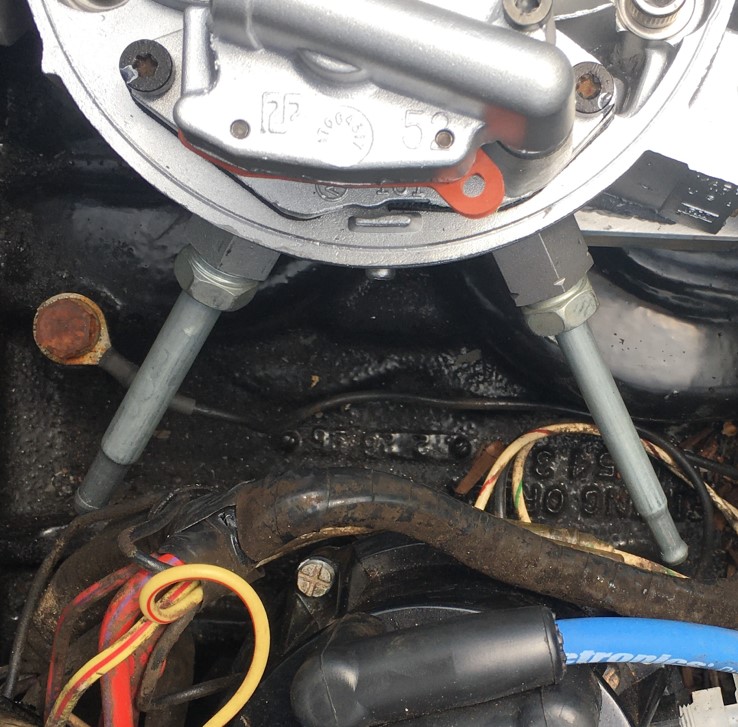
We were excited that our new kit came with a new distributor. This meant one less thing on our boat that was in used condition and could fail in the near future! The new system runs a fuel injected distributor. This style distributor works with the ECM and coil for fuel and spark timing. These new components will replace the original Thunderbolt ignition system which can be costly to repair if the computer module fails and was the original on the boat.
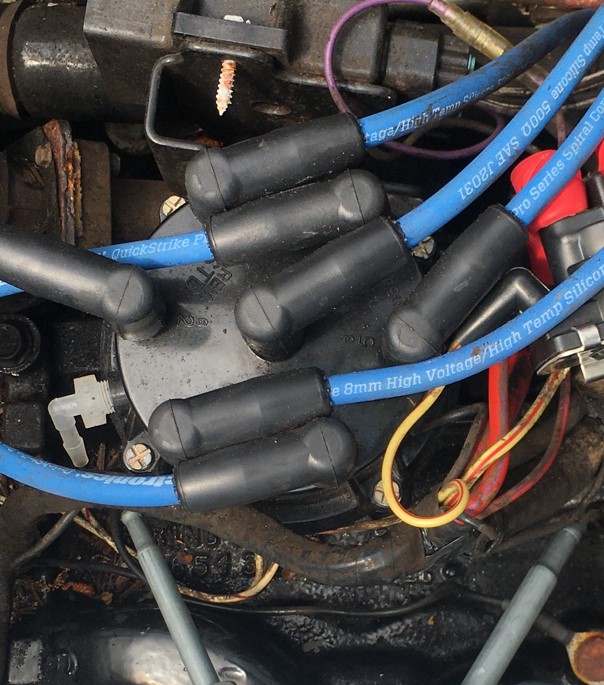
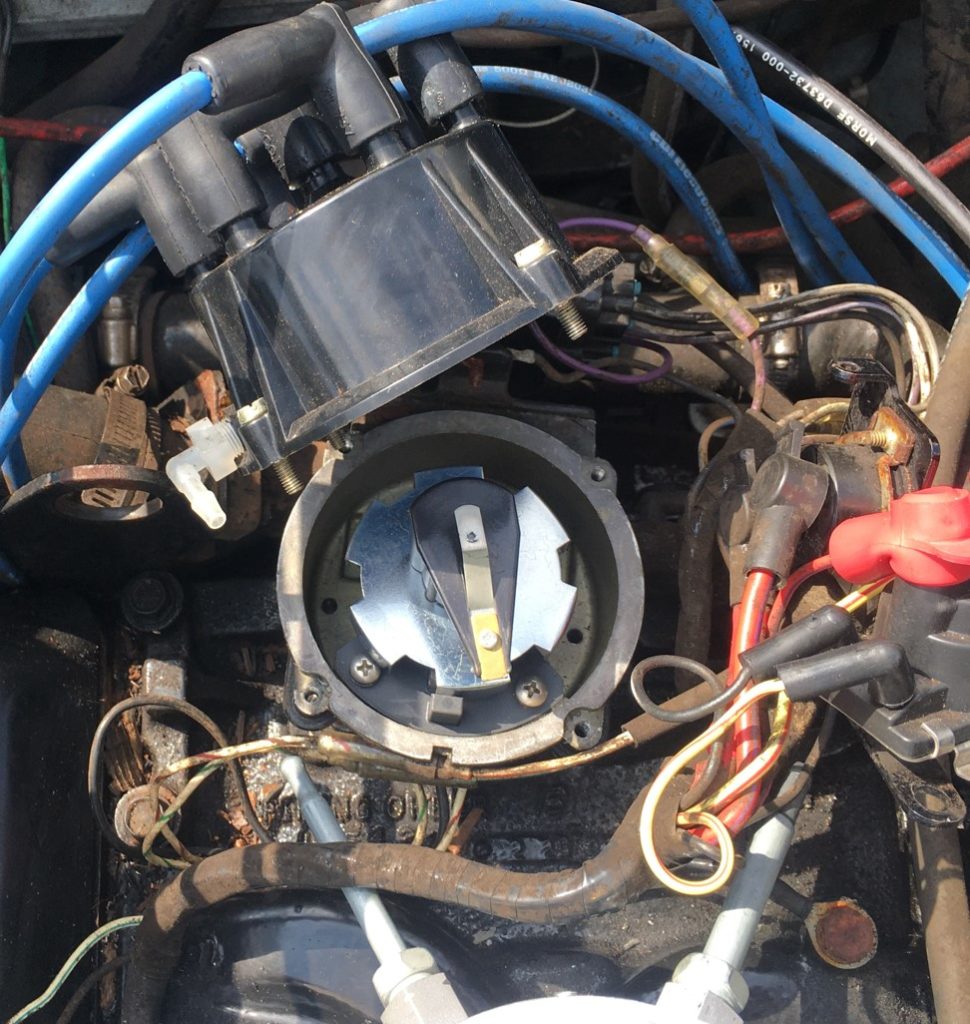
The spark plug wires were removed from the old distributor and placed to the side. The Thunderbolt ignition system simply unplugged, and the old distributor was freed up by removing the single mounting bolt. Before pulling the distributor from the engine, we made sure we followed the standard procedure for replacement to make sure the firing order was correct when we installed the new one. Make sure to look this up if you are unfamiliar as taking note of your old unit will help understand how the new one should be installed!
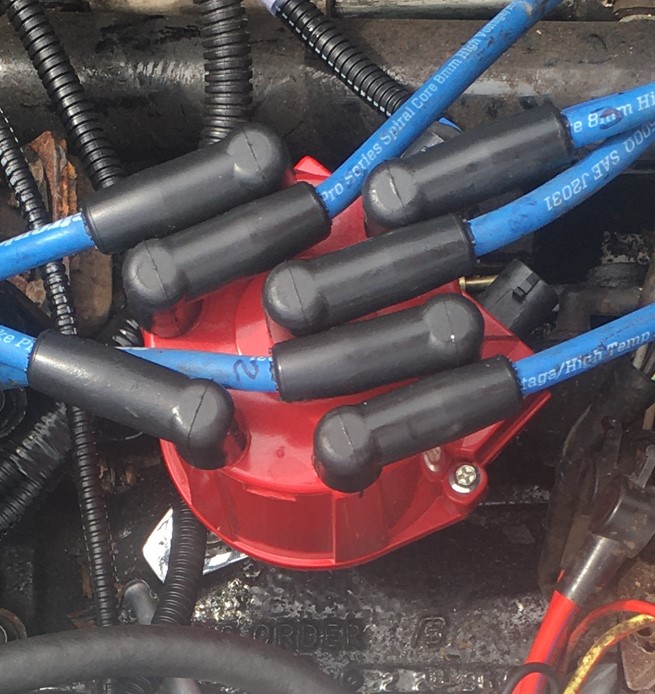
Once we had our engine at top dead center and the new distributor physically installed in the proper orientation, we were ready to move on to the next step. All of the spark plug wires were reinstalled with the proper dielectric grease. At this point the new distributor setup was physically complete and just needed timed once the engine was started.
Fuel Components
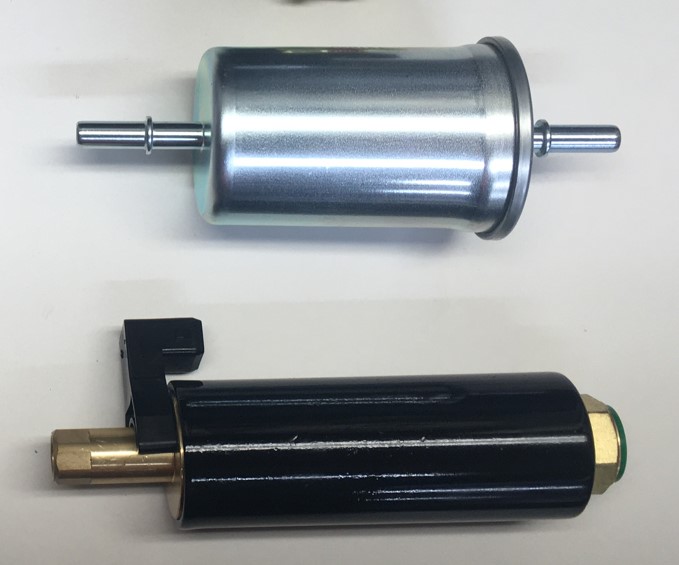
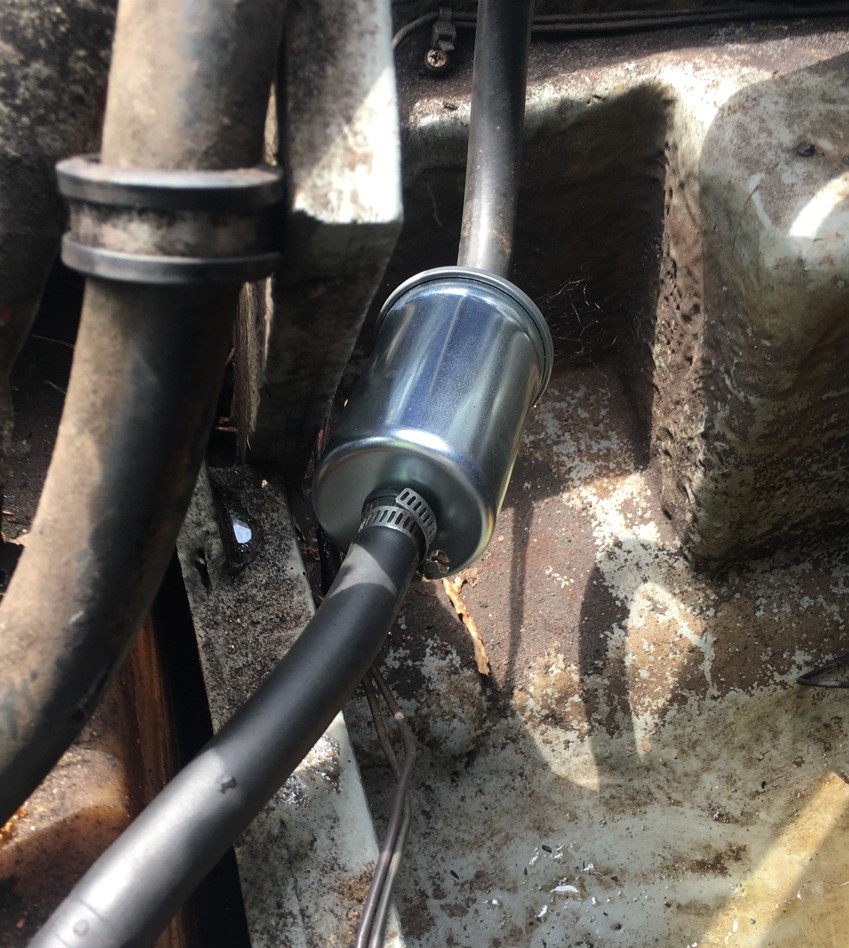
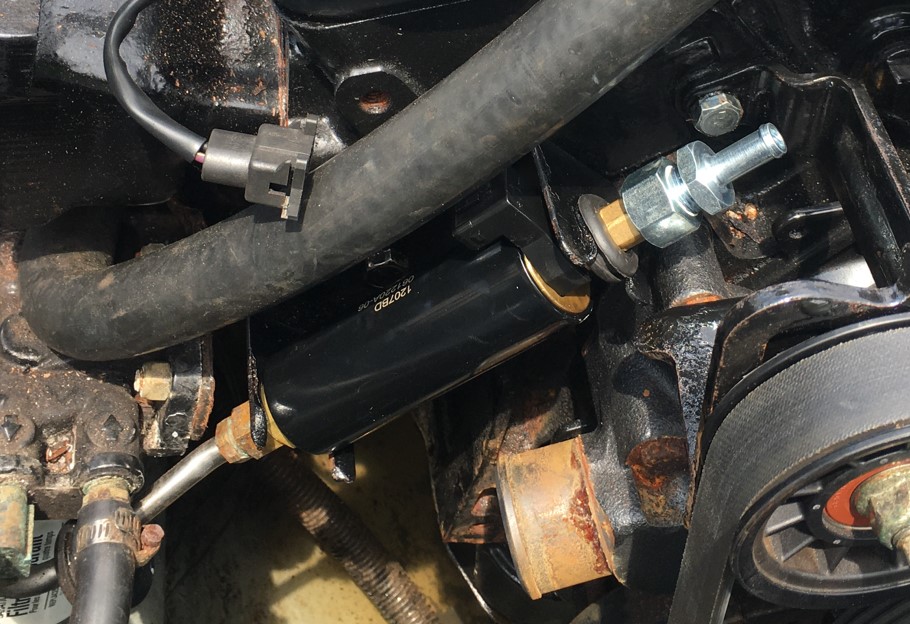
Next step was the installation of a few new components for the fuel delivery. A new fuel pump as well as fuel filter were included with the kit. Universal rubber fuel lines from the local auto store were installed and we were good to go. In our particular kit we ran a line from the fuel pump to the supply line on the TBI unit, and the return line to the vent line on the boat.
All of the mounting hardware was included for the pump and filter. We were able to use the stock location and brackets for the fuel pump as it was the exact shape as the original, just a different flow rate. The filter was also installed in the same position the original fuel filter was in which made the installation a breeze.
Wiring Harness
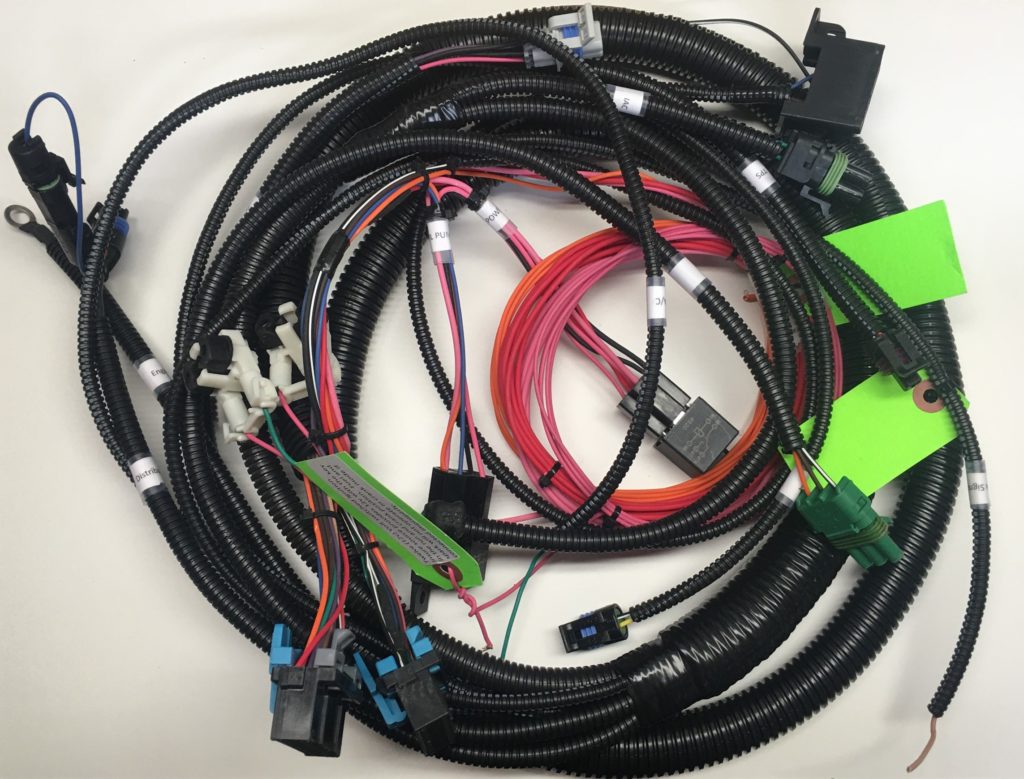
The wiring harness was a very impressive item for us. We were amazed how easy it made the job and how nice it turned out. It was a big selling point as every wire and clip on it was brand new. We imagined what we might be working with if we would have gotten a used harness from the junkyard – dirty greasy wires, brittle plastic plugs with broken clips, dry rotted insulation, and wires that were anything but the proper length for our application. This harness was anything but that, it was… beautiful.
All of the wires and plugs were labeled, some even had instructions attached to them. Just about the entire harness had a protective wire loom on it. All of the wires were color coded to match the included wiring diagram (which, we didn’t even use because the kit had such good instructions and labels). Most of the harness consisted of plugs which made the installation very easy. There were a few wires that needed terminated which included:
- 12V power source
- 12V ignition power
- Ground wire
- Check engine light
- Starter solenoid power
- Fuel pump power/ground
Different kits have different options so the amount of wires that need terminated may vary depending on your application. With most of the components being plugs, the installation went fairly quickly. We took time to make sure we routed the wires in stock locations and out of the way of moving parts as well as anything that might get hot.
Final Touches

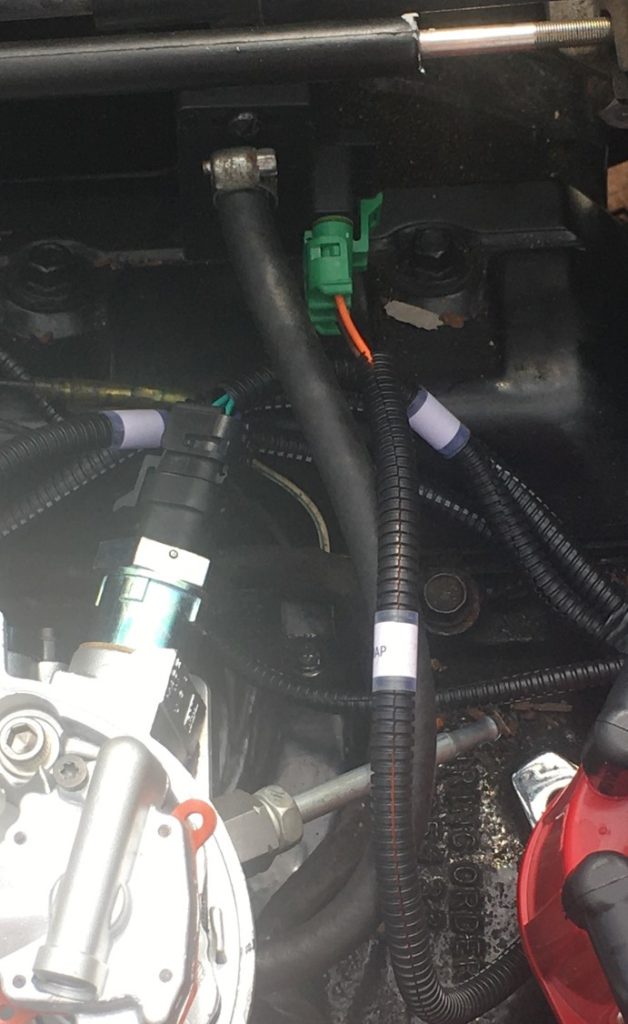
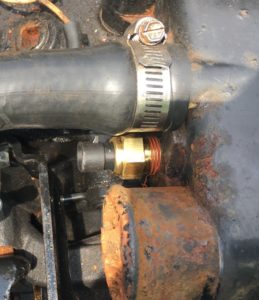
There were a few odds and ends that needed to be installed. For the items that came with the kit, these included the MAP sensor, and a coolant temperature sensor. We mounted the MAP sensor on the shift linkage bracket where there was a spare threaded hole. The coolant temperature sensor was mounted in an extra hole in the cooling block at the top front of the engine. We had an extra port that only needed the plug removed which made the job simple.
For the items not in the kit, we purchased an air cleaner as well as a few vacuum line caps and wire terminals. Nothing major. The biggest piece of the puzzle we had to figure out was how to get the throttle cable connected to the linkage on the new TBI unit, and mount the cable. We were able to fabricate a throttle cable mount as well as use the original threaded stud on the throttle bracket to mount the cable to.
Finally, it was time to plug the ECM in and give it a shot. Since the ECM was originally build for a truck, we bought an enclosure to ensure any additional moisture wouldn’t get to the unit should there be some kind of water or moisture that came into the boat. This wasn’t necessary, but it made us feel better. Once installed, we simply mounted the unit in a secure spot that was hidden and out of the way.

Final Product and Test Drive
We spent the time we needed to physically swap the parts over which worked out to be less than a week (this was working on the project part time each day). While we felt it was very reasonable, we were very anxious to turn the key and see what happened. What we saw was astonishing. We had spent a fair amount of time in the past with the boat we installed this kit on. Unfortunately, a good amount of the time was spent cleaning, rebuilding and tending to the carb. It seemed we were never sure what would happen when it was time to start the engine.
After completing all of the work and checking it twice, we turned the key to the first position a few times to prime the fuel system. Hearing the fuel pump run when we turned the key was music to our ears. One step closer. Not to mention we didn’t have to troubleshoot anything either. Finally, boom. We turned the key to the start position and the engine started right up on the first try. It’s not that we didn’t have faith, but it was just a great relief knowing we touched a fair amount of components.
The boat drove just as it should as we took it out on the water. We’ve taken it out for a few trips at this point and are enjoying the setup. We’ve run it for short durations, long durations, cold starts, hot starts, and it has started right up on the first try for each time. From a performance level, not much has changed. There is a slight different in feel during acceleration and deceleration but this is probably due to any slight difference in the shape, size, and opening/closing of the throttle plates in the new throttle body. Overall, everything has worked as advertised.
Final Thoughts
When all was said and done, we couldn’t be happier with the final product installed on the boat. The kit was very easy to install, fit perfectly, and everything was delivered clean and ready to go. When we looked into buying our kit, we thought of it as an investment. We looked at it in every angle from reliability, cost, and performance. We checked off all of our boxes and have a great performing boat to show for it.
There are many different EFI setups, fuel injection conversion kits, and options out on the market. It can be overwhelming when trying to decide if it’s the right choice to get rid of your carburetor, and if so, which kit is best for you. We hope this article has given you an idea of what you can expect to go through when looking for the best fuel injection conversion kit for your application, the installation process, and the benefits you will enjoy with your new setup. Happy Boating!
Disclaimer: Smooth Sailing Marine is not affiliated, associated, authorized, endorsed by, or in any way officially connected with Affordable Fuel Injection. All product and company names are trademarks™ or registered® trademarks of their respective holders. Use of them does not imply any affiliation with or endorsement by them.