
Why Would You Need to Remove a Carb?
There are many reasons to remove a carb from a machine, in this case, a boat or an outboard unit. One of the biggest reasons to remove a carburetor from a boat is to clean it. After much use, carbs get dirty and gummed up from dirt and old fuel. This can come in the form of any kind of foreign substance that enters the fuel tank, or fuel that gets gummed up typically due to age or sitting in the lines or tight passages of a carburetor for an extended period of time.
Required Tools and Parts
Required Tools
- Phillips head or straight edge screwdriver
- 10mm socket
- Ratchet extension
- Ratchet
- Small vice grips
- Pliers
Required Parts
- Carburetor gasket kit (if reinstalling)
Steps to Remove a Carburetor
1. Remove the outboard cowling
Unfasten the two buckles that hold the engine cowling down by pulling the lower half out and up. There is one in the front, and one in the back. Once both are unfastened, the cover will lift off by being maneuvered around the gas cap and pull cord/choke panel.
2. Remove the gas tank
Remove the three bolts holding the gas tank in position. Using a pair of pliers, remove the clamp that holds the fuel line onto the carburetor. Use a pair of small or needle nose vice grips to clamp the fuel line so no gas is spilled when removing the tank. Once the line is clamped, remove the line from the carburetor and set the tank off the the side.
3. Remove the pull cord and choke cowling
Remove the 3 bolts pictured using a 10mm socket. Once the bolts are removed, the cowling will have to be lifted slightly and the choke cable disconnected prior to fully removing the cowling. This is important to remember so the choke cable does not get bent.
4. Remove the choke cable from the throttle body
Disconnect the choke cable from the choke on the carburetor by using a screwdriver or needle nose pliers to maneuver the cable from the choke arm. Once free, the cowling can be fully removed.
5. Remove the fuel cutoff switch
Turn the fuel cutoff switch to the “On” position to access the screw that holds the tab on the post. Use a phillips head or straight edge screwdriver to remove the screw. Once the screw is removed, simply pull down on the tab to remove from the post.
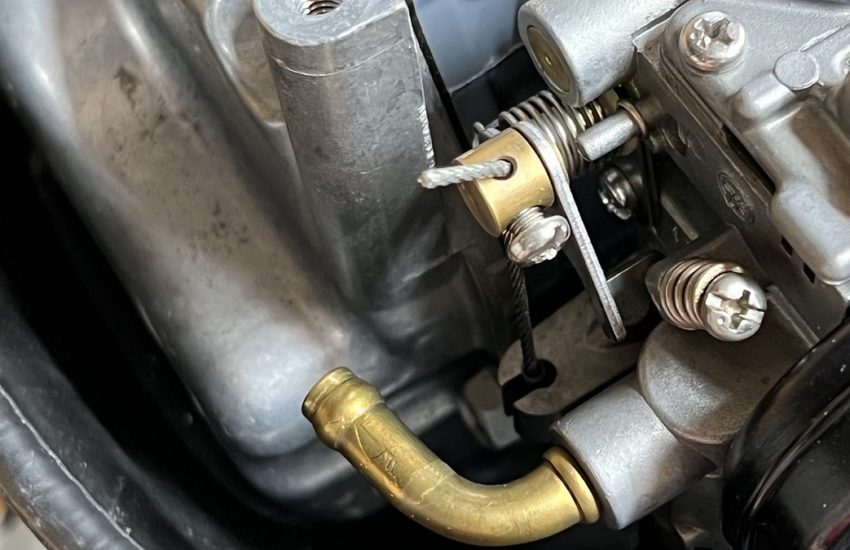
6. Disconnect the accelerator cable from the carb
Use a phillips head or straight edge screwdriver to loosen the screw that holds the accelerator cable to the throttle plate assembly. Pull the cable out from the clamp on the carb once it has been loosened to free the cable from the unit.
Note: This screw does not have to be fully removed but simply loosened enough that the cable can be pulled out of the housing. Make sure to mark the cable where it was clamped so it can be reinstalled in a similar position.
7. Remove the carburetor
Steps to Install a Carburetor
Installing the Carburetor is the reverse of removing it, however, you must make sure to install the carb with new gaskets.
Frequently Asked Questions
Why do you need new gaskets when installing a carb?
If you’re wondering why you need to install a carb with new gaskets, you’re not the only one. A carburetor requires a certain amount of vacuum when it mixes fuel and air prior to entering an engines combustion chamber. The proper amount of vacuum can only be achieved if there are no leaks at the mounting surface of the carb and the engines intake. If a new gasket is not used during installation, there is a risk of air leaks, which will result in an improper air to fuel ratio entering the engine.
Smooth Sailing Marine is powered by product recommendation partnerships.
If we have helped you in your product decision or marine project, you can help us by purchasing through our links. We thank you for your support, we couldn’t be here without our awesome readers!