
Changing the oil on your boat’s inboard engine is just as essential as changing the oil on your vehicles engine. This should be top priority on your boats maintenance list to ensure it stays running well for years to come. A routine oil change will keep the oil in the engine fresh, free of contaminants, and able to properly lubricate all the the moving internals that require it.
We’ve outlined a few key tools and supplies typically used during an oil change, as well as listed out the steps of performing an oil change. Whether you’re looking to learn how to change your oil, or decide if you’re capable, this guide will make the process a breeze. Read on to learn more!
How Often Should You Change the Oil in Your Boat’s Engine?
The frequency in which you should change your boat’s oil will vary slightly depending on the model you have. Typically, engine and boat manufacturers recommend changing your boat engine’s oil every 75 to 100 hours, or once a year.
It’s typically recommended to change your boats oil in the fall. This is due to oil collecting contaminants while being used that can cause damage to the engines internals while it sits all winter. Corrosion and other damage can occur if these are not removed from the engine. On top of oil collecting unwanted foreign matter, if there is any kind of water in the oil this could end up freezing or causing damage to the metal internals as well.
What Kind of Oil Does a Boat Engine Use?
We’ve listed some of the more popular boat engines and the oil the manufacturer recommends. Make sure you stick to the manufacturers recommendation as the oil is selected based on the engines specs and tolerances. If the incorrect oil is used in an engine, premature wear and or failure could occur.
- Mercuiser (All Models, 3.0L-8.7L): SAE 20w-40 full synthetic
- Volvo Penta (Gasoline 4.3L-6.2L): SAE 10w-40 full synthetic
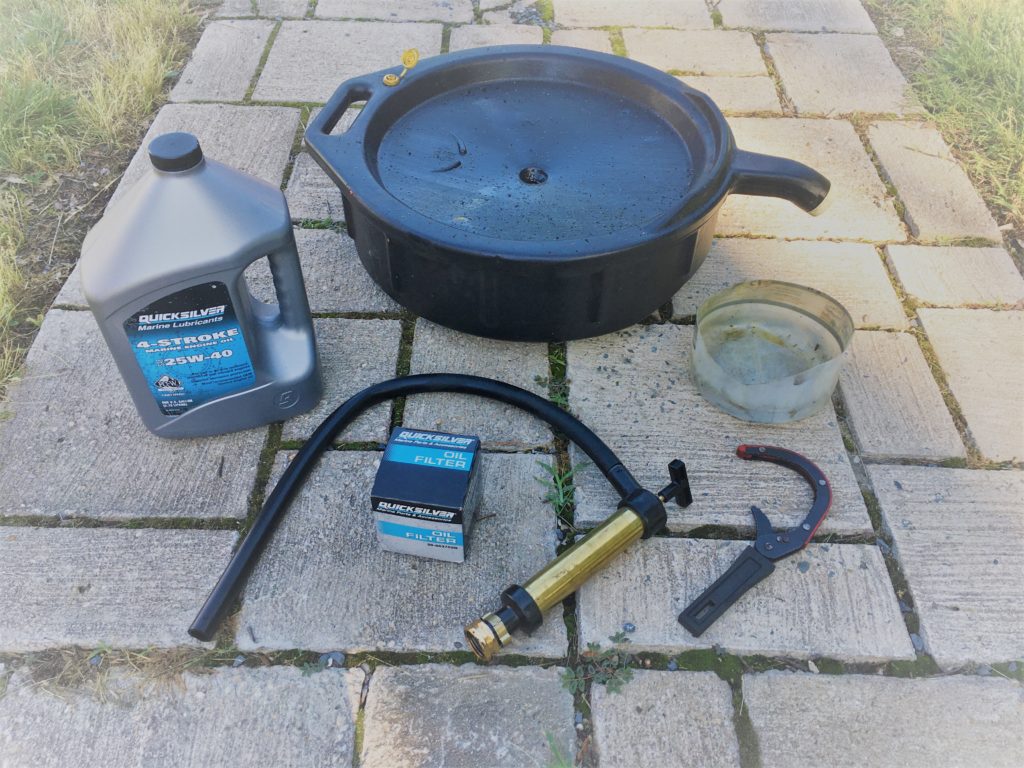
Required Supplies for Changing a Boat’s Oil
- Oil Drain Pan
- Small Catch Pan
- Oil Drain Pump
- Oil Filter Wrench
- Engine Oil
- Oil Filter
Steps for Changing the Oil in Your Boat’s Engine
1. Run the Engine to Bring it to Operating Temperature
Before you begin the actual process of removing the oil from the engine, it should be run for a few minutes to get it up to operating temperature. This will make the oil easier to remove as it will have a lower viscosity and will stir any small particles that may have settled so they will be removed with the oil.
If you’re changing your boats oil while it is out of water, you’ll need to have a set of motor flushers, or muffs, to be able to run it. Be sure to check out our article on how to run your boat out of the water for instructions, tips, and recommended hardware for doing this.
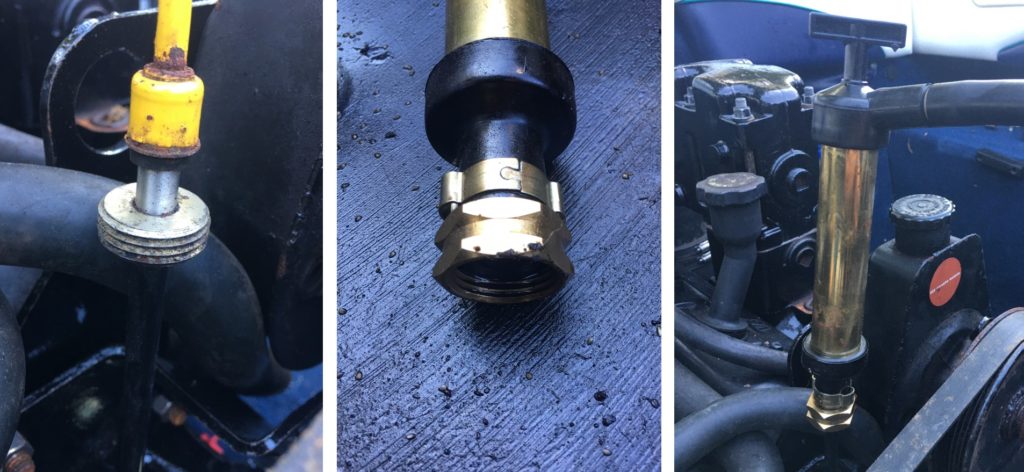
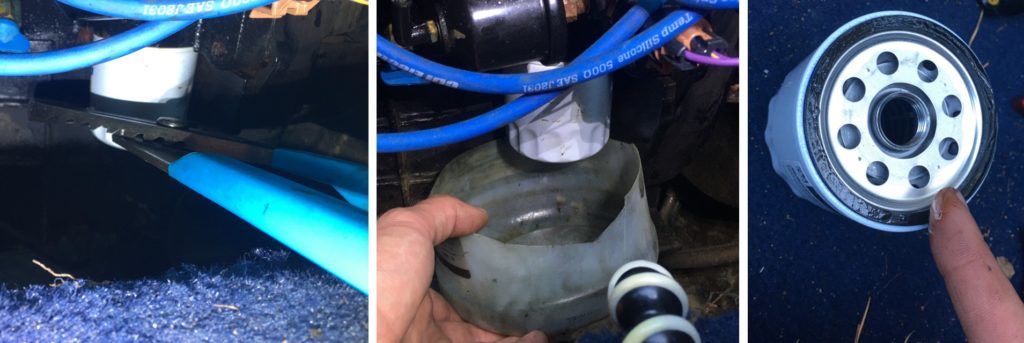
2. Connect an Oil Drain Pump to the Dipstick
Required Tools:
You’ll need an oil drain pump to pump the oil out of the engine. Most inboard engines will have threads on the dipstick tube to mount a drain pump. If your engine does not contain threads on the dipstick tube, you will have to purchase a pump that can reach your oil pan through your dipstick tube, or drain the oil out through the oil pan. Make sure your pump is threaded on nice and snug to make a good seal and keep any air from entering the connection. This will make pumping the oil out even easier.
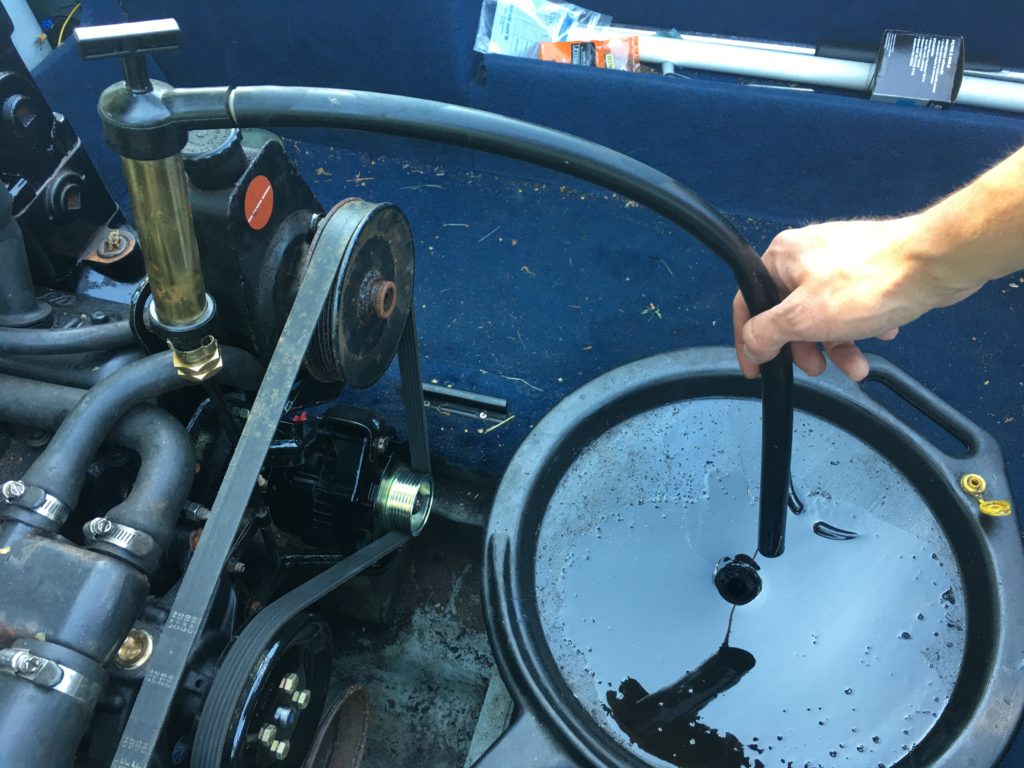
3. Pump the Oil Out of the Engine
Required Tools:
Once the pump is securely connected to the dipstick threads, simply aim the hose into the oil pan and pump the pump until oil starts exiting the tube. Simply keep pumping until there isn’t any oil left to come out of the engine! Take care not to splash or come in contact with the oil as it can still be hot from running the engine.
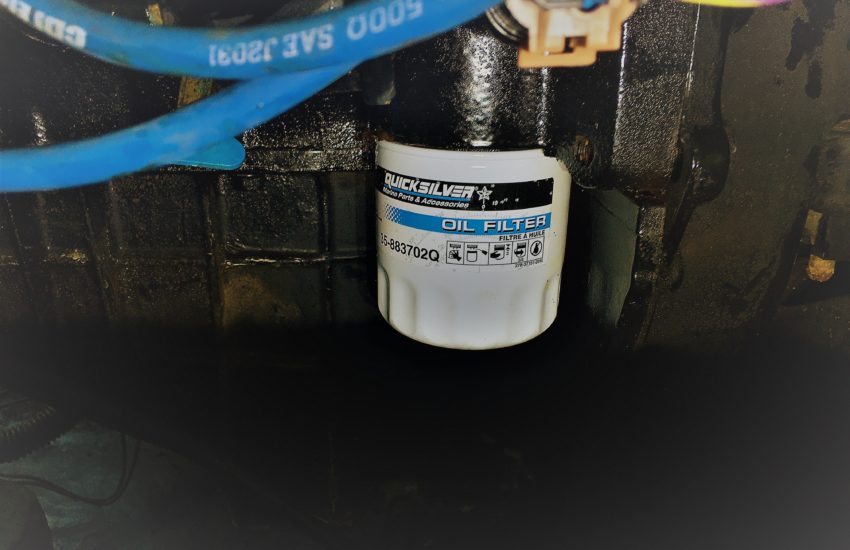
4. Change the Oil Filter
Required Tools:
- Oil Filter Wrench
- Small Catch Pan
Once the oil has been completely emptied from the engine, the next step is to replace the oil filter. Simply unscrew to remove. This can be done using an oil filter removal tool, or using a large set of channel locks depending on the angle or any interferences around your filter.
We recommend using a small catch pan to catch any oil that may come out of the filter mount to avoid going into your boats hull. This will save cleanup time as well as keep any water that is pumped out by the bilge pump free of contamination. We use the bottom of a 1 gallon bottle that fits great in tight spaces. When installing the new filter, it is recommended to apply a thin layer of oil to the gasket. This will ensure the rubber will not stick to the mating surface and the filter will be easier to remove on the next filter change.
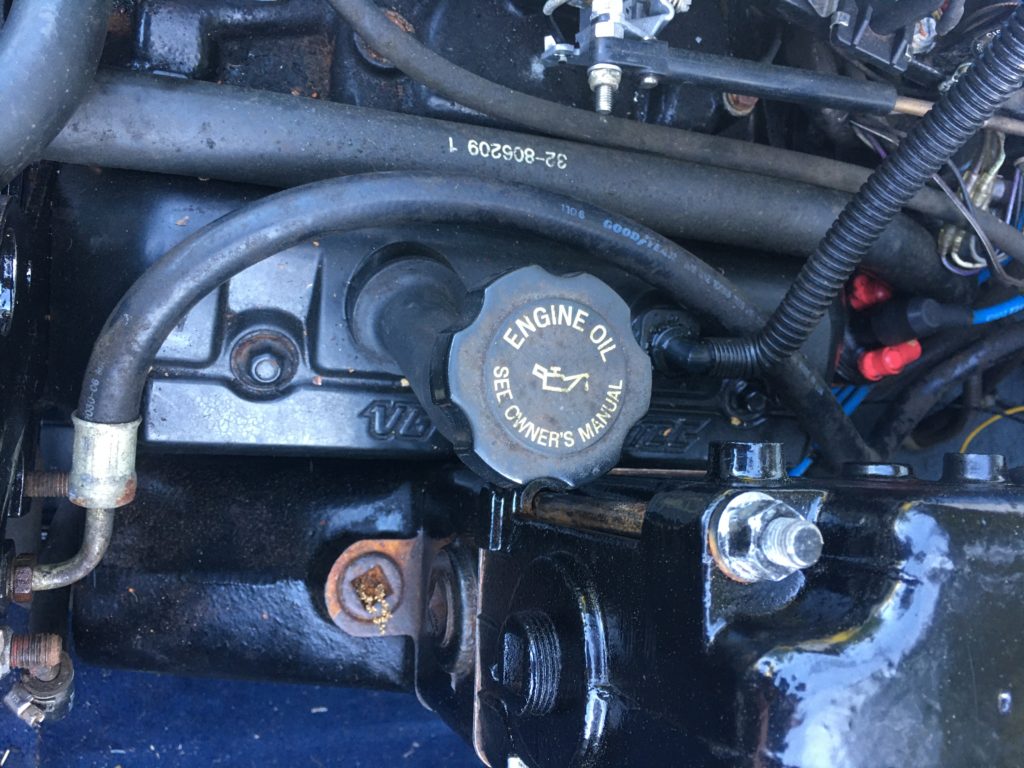
5. Refill the Engine With Oil
Required Tools:
Once the oil filter has been installed, the engine can be filled with fresh oil. Simply fill while checking the level on the dipstick, or consult your engines manual if you prefer to add the exact amount by measurement. If adding an exact amount, it’s still recommended to check the dipstick once complete to ensure the level is correct. We typically use a funnel when refilling as it reduces the chances of spilling oil and makes the job easier.
Final Thoughts
Congratulations, you’re all done with your oil change and one step closer to hitting the water! Once complete, always make sure to properly dispose of your used oil and oil filter to help protect the environment.
Oil changes may sound intimidating but anyone with basic knowledge can complete one in a short period of time. We hope this guide has helped you complete your oil change, or helped save some money by avoiding a costly mechanic.